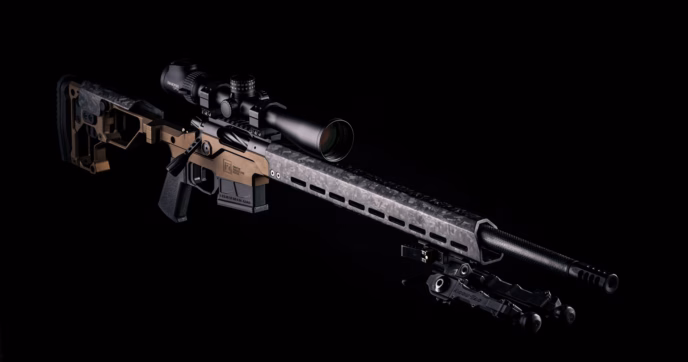
Both functionally and aesthetically, no rifle build is truly complete without an optic. But, as satisfying as it is to mount your scope to your rifle, that’s just the first step. Right out of the box, your scope isn’t ready for the field yet. And although its reticle may appear to be aligned with your target, it isn’t likely aligned with your rifle’s bore.
Just like any other optic, your rifle scope needs to be zeroed to be effective at distance. It sounds technical and intimidating when you’re new to the game. But the process of zeroing your optic is actually far easier than you might think.
With a little bit of patience, some preparation, and a little know-how, you can have your scope zeroed in an afternoon.

Understanding the Basics: What Does “Zero” Mean?
Before getting into the weeds on the zeroing process, it’s good to get a baseline for what exactly ‘zeroing’ means.
Your optic’s zero is the specific distance where your reticle and point of impact are aligned. If you were to immediately use your optic without zeroing it first, there’s no telling where your impacts would land. Properly zeroing your optic is critical if you plan to use it at distance. Still, there’s more to zeroing than just moving the reticle to where you want your shots to land.
Take the bullet’s flight path, for instance. Projectile doesn’t fly in a perfectly straight line, they have more of an arc. So, if you were to zero your rifle at 100 yards, your POI (Point of Impact) will be aligned with the reticle at 100 yards. And once you start engaging targets farther than 100 yards, you’ll need to make holds to compensate for the bullet’s drop. Once you know your initial zero, you’ll be able to do so with ease.
But your ability to use your rifle effectively all depends on how precise your initial zero is. If you don’t already, you’ll need to know how your scope functions and what its dials mean.

Scope and Zeroing Terminology
Turrets
First up are the turrets. These are the knobs on the top and side of the main optic body. The upper knob adjusts the elevation—the up and down movement—of the reticle. Meanwhile, the turret on the side of the optic controls the reticle’s windage—its left to right positioning. Both turrets use a tactile click to indicate each adjustment. Though this can vary depending on the scope you have, most use either a ¼-MOA or 0.1-MIL adjustment per click. This lets you fine-tune your reticle position to get the most accurate zero possible.
MOA and MIL/MRAD
If you’re a complete beginner, you might be confused upon reading ‘MOA’ and ‘MIL’.
MOA is an acronym for “Minute of Angle”. This is an angular measurement that’s used when adjusting your zero. At 100 yards, 1 MOA accounts for roughly 1 inch. So, if you’re zeroing your rifle at 100 yards, one ¼-MOA click would reflect a ¼-inch shift in your reticle’s alignment, with four clicks accounting for an inch down range.
‘MIL’, or ‘MRAD, is just an abbreviation of the word milliradian. Milliradians are another angular measurement used predominantly on rifle scopes to indicate the reticle’s position. At 100 yards, 1 MIL/MRAD equates to 3.6 inches, with every 0.1-MIL adjustment moving the reticle’s relative position by 0.36-inches.
While both measurements are immensely effective, it’s important to make note of their differences. For starters, MOA-based measurements work best with imperial measurements like inches and yards. MIL-based scopes can work with imperial measurements, but it’s often simpler to use metric measurements like centimeters and meters. 1 MIL accounts for roughly 10 centimeters at 100 meters, so each 0.1-MIL click would adjust for 1 centimeter.
Ultimately, using one over the other is a matter of personal preference. And both can get you a precise zero on your rifle scope.

Preparation and Gear
Zeroing your rifle scope starts with good preparation and having the right gear on hand. For starters, you’ll need your rifle and scope, 40 to 60 rounds of ammo (around 2 to 3 boxes worth), a target with 1-inch grid squares, and lastly, eye and ear protection.
Outside of these though, you’ll need to make sure to have a stable platform to rest the rifle on, such as table with a benchrest. This is the best way to get repeatable results when firing. If your range doesn’t have a shooting bench, you aren’t entirely out of luck. You can achieve a similar level of stability with a bipod and a sandbag to rest on.
In addition to a stable shooting position, it’s also a good to have a spotting scope on hand. Now, a spotting scope isn’t required for zeroing your rifle, but they can offer higher magnification than most rifle scopes. This is great for getting a closer view of your target without leaving the bench. Again, they aren’t a necessity, but they’re worth bringing along if you already have one.
It’s good to doublecheck that your optic is securely mounted to your rifle. Many newcomers often tighten the mount without torquing it to spec. Torque specs vary depending on the mount, but they’re often listed in the manual (you can always check the manufacturer’s website, too). We recommend using a medium-strength thread locker on the hardware, as well as a torque wrench to tighten everything properly. Afterwards, you’ll be ready to zero your scope.
Choosing your Zero Distance
During the prep stage, it’s good to get an idea of what zero distance you’d like to have. Choosing your zero distance ultimately depends on the type of optic you have, as well as how you plan to use your rifle.
Take a Low-Power Variable Optic (LPVO), for example. Such scopes are most often used on AR-15s, and other similar rifles with an effective range of around 500 to 600 yards. To maximize performance, professionals often use either a 36- or 100-yard zero, depending on the scope’s reticle. A 36-yard zero allows you to easily engage both close-up targets as well as distant ones. Their only caveat is their steeper learning curve for making proper holds at distance.
Meanwhile, LPVOs with BDC (bullet drop compensating) reticles, or higher power optics, work best with a 100-yard zero in most cases. 100-yard zeroes are, by far, the simplest and most beginner-friendly option. It simplifies a lot of the mental math needed for making holds further or closer distances, and if you’re using a BDC reticle, it’ll let you use all its calibrated holds with no issues.
At the end of the day, it’s up to you to decide which zero distance is best for you. But, if you’re a beginner, we recommend sticking with a 100 yard zero. It’s a great starting point, and it’s versatile for myriads of applications. But, regardless of the distance you choose, the zeroing process is the same.

Zeroing Your Rifle Scope
Getting Started
While you might be tempted to go ahead and set your target at 100 yards, we recommend getting a baseline zero at 25 yards. Although it seems counterintuitive, if your optic’s initial zero is already wildly off center, you could miss the target entirely at 100 yards. And, if you don’t have a spotter pointing out where your round splashes off target, adjusting your optic will be a pain.
The goal is to make sure that your shots are impacting the paper. So, with your target set up at 25 yards, take aim at the center of the target and fire a string of 3 to 5 shots to see where your projectiles land. Taking note of their grouping, re-center your reticle on the bullseye and adjust the zero accordingly.
When you adjust your reticle, your goal is to bring your reticle to your grouping, not the other way around. So, if your grouping is low and to the right of the bullseye, you would need to adjust your reticle’s windage and elevation in the same directions. Once you’ve done this, center your reticle on the target’s bullseye, fire another string of rounds, and continue to adjust until your shots land roughly on the center of the target.
If you don’t want to burn through too much ammo, we recommend using a laser bore sight. A laser bore sight is a device that fits in your rifle’s bore and projects a laser on target. Because it sits within the barrel, wherever the laser shines represents where a projectile would impact. With it illuminated, your initial zero is as simple as lining up your reticle with laser’s dot on target. Plus, you can save some ammo for later on.
Zeroing at 100 Yards
Once you’ve gotten 25 yard zero to make sure your shots are hitting paper, you’re ready to step out to 100 yards to get your final zero. In essence, this process is the same as it was for zeroing at 25 yards, though you won’t be able to use a laser bore sight at this distance.
Start by setting up your target up at 100 yards and then set up your rifle on a stable shooting platform. With your rifle stabilized, take aim at the target, aligning your crosshairs with the bullseye. Fire a string of 3 to 5 shots, making sure that your reticle is centered on the bullseye each time. After firing, check your target to see where your grouping is. At 100 yards, you’ll probably be able to see your grouping with just your rifle scope. If you can’t get a good view, you can either use a spotting scope, or you can walk to your target. Just make sure that the range is cold, and your rifle is unloaded before walking down the range.
Either way, once you’ve seen your first grouping, you can adjust your zero accordingly. Zeroing at distance can be a bit tricky since the geometry changes the further you get out. If you zeroed at 25 yards initially, you’re now four times farther. So, where it would have taken 16 clicks to move an inch (assuming your scope uses ¼-MOA clicks), it will now take just 4. This is why we specified using a target with 1-inch grid squares. Using the grid as a reference, you can take where your initial group is and calculate the rough distance between it and the bullseye of the target.
Once adjusted, you can fire another string to see where your group impacts the target. Just like before, repeat this process until you’ve achieved your zero. Keep in mind, this process is still doable even if you don’t have a grid-square target. It just requires you to estimate the distance using your best judgement.

After Zeroing
Locking your Turrets
Many premium optics like those in the PLx® Line from Primary Arms Optics, Vortex Optics’ Razor Series, and the NX8 Line from Nightforce have locking turrets. And locking them is a solid way to make sure that you don’t lose your initial zero if you ever make adjustments later on. However, not all optics have locking turrets. If you don’t know if your optic has them, you can check the included manual, or the manufacturer’s website.
If your optic does have locking turrets, follow the manufacturer’s instructions to lock in your zero. Although many optics can have locking turrets, the way they lock varies depending on the model. Either way, after you’ve locked the zero, if you ever adjust your windage or elevation in the field, you can just turn the turrets back to their locked position, rather than having to remember how many clicks you adjusted for.
Now, if your optic doesn’t have locking turrets, you aren’t entirely out of luck. Though you can’t lock your turrets down, you can use a paint pen or a marker to physically mark your turrets. This gives you a visual reference for your point zero and is a good work-around if you don’t have locking turrets.
Ammo Variances
The type of ammo you use can have a pretty drastic effect on your zero. Different ammo loads offer different characteristics. The powder they use can produce different pressure levels, while the projectiles themselves can have varying grain weights. Both of which affect muzzle velocity.
As such, it’s important to take note of your ammo load if you ever switch to another type. It likely isn’t going to have the same exact flight characteristics as the one used to make your initial zero. Whether your shots impact higher or lower is dependent on many factors, but fortunately, most ammo manufacturers provide ballistic charts for their ammunition. With them, you can still get a rough idea for how it will perform out of your rifle.

Conclusion
Zeroing your rifle scope is a task that seems more difficult than it is. Though it can be daunting to sight in your rifle scope if you’re a beginner, it’s more than possible to do so in an afternoon.
Still, even if you have the right equipment and expertise, dialing in your scope comes with a learning curve. This is especially true if you’ve never done it before. So, if you get discouraged at the range, remember that everyone had to start somewhere.
If you take time to prep your gear before hitting the range, know your zero distance, and know how to use your scope’s controls, you’ll be a pro in no time.
Can I zero my rifle without a stand or sandbags?
It’s possible but not recommended. Free handing your rifle introduces a lot of room for error. Doing so can make it difficult to get an accurate zero, as you likely won’t be steady enough to get a repeatable point of reference for each shot. Plus, it’ll be hard to accurately compensate for your own movements/human error. If you don’t have a benchrest or sandbags, a backpack or even a rolled-up jacket can work in a pinch.
How often do I need to re-zero my rifle?
If you buy a quality mount and scope, your zero should hold true for a long time. That said, it’s always recommended to check your zero if:
1. You remove the scope and put it back on.
2. You drop the rifle hard.
3. You change ammunition brands or bullet weights.
4. You travel to a location with a drastically different altitude or temperature
What if I run out of adjustments on my turrets?
If you bottom out your turret and the bullet still hasn’t reached the bullseye, you likely have a mounting issue. The base might be canted, or the barrel might not be aligned with the receiver. You may need a canted scope base to get some added height, or you should consult a gunsmith.
Does zeroing at 100 yards work for 25 yards?
Not exactly. Because the scope sits higher than the barrel (usually 1.5 to 2.5 inches higher), the bullet has to climb up to hit the zero point. If you zero at 100 yards, your shots at close range (like 10-25 yards) will impact roughly 1.5 to 2 inches low. You’ll have to aim slightly high to compensate for the difference.
Can I use a different ammo brand after zeroing?
You can, but it likely won’t hit the exact same spot. As noted above, different bullets have different weights, velocities, and ballistic performance. Even a small change can shift your impact by several inches at 100 yards. It’s best to zero your scope with whatever ammo you plan to use regularly.