When it comes to maintaining the clarity and functionality of high-performance optical equipment, the choice of cleaning method and materials is paramount. Ensuring that your lenses are spotless not only enhances the quality of the images but also preserves the delicate surfaces of your equipment.
From seasoned long-distance marksmen to casual binocular users, understanding the best practices for lens maintenance can significantly impact the longevity and performance of your optics. This article explores the most effective cleaners and techniques for keeping your lenses in pristine condition, helping you achieve the best possible results in your time outdoors.

Getting Started: Materials & Tools for Optic Cleaning
When it comes to cleaning lenses for cameras, telescopes, binoculars, or any high-performance optical equipment, using the right lens cleaner is crucial to avoid damaging the delicate coatings. Here are some of the best types of cleaners you can use:
1. Lens Cleaning Solutions: Opt for solutions specifically formulated for optical lenses. These are usually alcohol-based, which evaporates quickly without leaving streaks. Brands like Zeiss, Nikon, and Canon offer solutions that are safe for use on all optical surfaces. For pistol reflex sights, white vinegar can be a great option to remove fouling.
2. Microfiber Cloths: Always use a high-quality microfiber cloth alongside your cleaning solution. Microfiber cloths are effective at removing oils and fingerprints without scratching the lens. They can be used dry or with a cleaning solution.
3. Lens Cleaning Pens: These pens often have a soft brush on one end to remove dust and a non-liquid cleaning element on the other end to clean smudges. The Nikon LensPen is a popular choice, offering a convenient, effective way to clean without fluid.
4. Lens Wipes: Pre-moistened lens wipes are a convenient option for cleaning lenses on the go. They are typically individually wrapped and contain a solution that is safe for coated lenses. Brands like Zeiss and Care Touch are known for their streak-free formula.
5. Compressed Air Blowers: A good air blower can remove dust and debris from lens surfaces without touching the lens, thereby reducing the risk of scratching. This is often used before wiping the lens to ensure there are no abrasive particles left on the lens surface. Just remember to be gentle!
When using any lens cleaning product, it’s important to ensure that the cleaning solution is fully dried or removed before storage. Some cleaning solutions will seep in around the edges of the lens and erode the internal seal. Proper handling and care, however, will keep your lenses clear and prolong their life.
Most Common Mistakes in Cleaning Optics
When cleaning high-performance optics, such as lenses in cameras, telescopes, or binoculars, people often make several common mistakes that can compromise the quality and longevity of their equipment. Here are three such mistakes:
1. Using Incorrect Cleaning Fabrics: Many people use materials that are too abrasive for delicate optical surfaces. Paper towels, regular tissues, or the corner of a shirt are commonly misused instead of using microfiber cloths or lens-specific tissues. These materials can scratch the lens coatings and ultimately degrade the quality of the lens.
2. Gun Cleaners are NOT Lens Cleaner: Using gun cleaner and CLP (Cleaner, Lubricant, and Preservative) on optical lenses can be harmful and should be avoided. These substances are formulated for cleaning metal parts and mechanisms of firearms and may contain chemicals that can degrade or damage the coatings on lens surfaces. The harsh solvents and oils in gun cleaners and CLPs can lead to streaking, residue buildup, and even permanent etching on the lens, which can impair optical clarity and functionality. Moreover, these products can potentially seep into the optic, damaging internal components and affecting the overall integrity of the device.
We get it: when you’re cleaning a gun, it may seem expedient to give your optic a wipe down with the same rag. If it’s just a quick brush over the aluminum housing, then it’s no big deal. But if you’re getting gun oil on the lens, you should really do your best to clean it off quickly before you cause any damage.
3. Failure to Dry Completely: After cleaning, some may neglect to properly dry their optics, allowing moisture to linger. This residual moisture can seep into the edges of the lens or into the device itself, potentially leading to water damage or the growth of mold and fungi, both of which can severely affect optical performance.
4. Over-Cleaning: Over-cleaning can wear down the protective coatings on lenses over time. Some individuals clean their lenses too frequently or with excessive zeal, not realizing that every clean has the potential to strip away protective layers. It is essential to clean optics only when necessary and to do so gently to avoid removing these critical coatings.
Avoiding these common mistakes can greatly enhance the effectiveness of your cleaning routine and help maintain your optical equipment in optimal condition for longer periods.

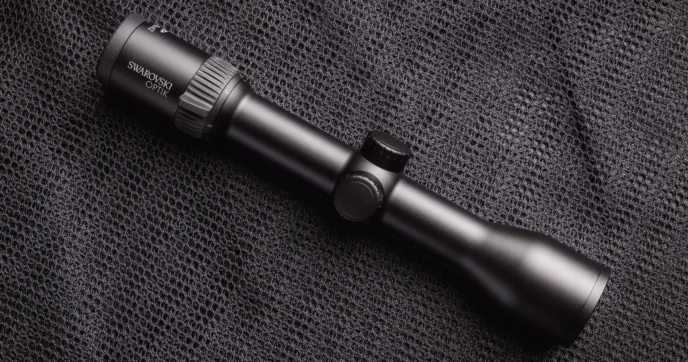
How to Clean a Rifle Scope or Prism Scope
Cleaning a rifle scope properly is essential to maintain its performance and longevity. Here’s a concise guide on how to effectively clean your scope:
1. Remove Dust and Debris: Start by gently removing any loose dust from the lens surface using a soft-bristled brush or a compressed air blower. It’s crucial to do this step carefully to avoid scratching the lens. A lens cleaning pen with a soft brush can help here.
2. Apply Cleaning Solution: Next, apply a scope lens cleaner, which can be a specially formulated optic cleaner or isopropyl alcohol (90% or higher), to a microfiber cloth.
3. Wipe the Lens: Gently wipe the lens with the dampened microfiber cloth in a circular motion starting from the center and moving outward. This method ensures that you don’t push debris across the lens, which could scratch it.
4. Dry the Lens: Allow the lens to air dry completely after cleaning to avoid any streaks or residues. Avoid using heat or a rough cloth to speed up this process.
5. Repeat if Necessary: If the lens still appears smudged or dirty, repeat the cleaning process until the lens is clear and free of obstructions.
It’s also recommended to always handle the lens with care and to use only tools and solutions that are appropriate for optic cleaning. Harsh chemicals, rough cloths, and excessive force can damage the lens and affect your scope’s performance.
Thankfully, scopes are a lot more resilient than many gun-owners realize. Manufacturers put a lot of work into sealing these optics so that they can perform well in harsh environments. If you’re interested in learning more about rifle scope design, be sure to check out our recent article: [How Does a Rifle Scope Work].

How to Clean a Red Dot or Reflex Sight
Cleaning a red dot sight or reflex sight, especially one with an exposed emitter, requires careful handling to ensure the optic remains in good working condition and continues to provide clear, accurate targeting. Here’s a guide to properly clean your red dot sight or reflex sight:
1. Remove Dust Gently: Start by removing any dust or debris. Use a soft brush or a can of compressed air to gently blow away particles from the lens and the emitter, if it’s an open reflex. It’s important to avoid touching the emitter with anything solid, as it is very delicate.
2. Clean the Lens: Apply a small amount of red dot lens cleaner to a microfiber cloth or use a pre-moistened lens wipe designed for optical surfaces. Isopropyl alcohol will also work. Gently wipe the lens in a circular motion, starting from the center and moving outward. For mini reflex sights with small lenses, it may help to use soft cotton swabs.
If you shoot a lot, you’ll often find the front of your lens covered in carbon fouling. This is a common issue, given the position of the optic relative to the barrel hood. If you’re having a hard time removing the carbon, a bit of white vinegar can return the lens to a crystal-clear condition!
3. Wipe Down the Body: Use a dry microfiber cloth to wipe down the body of the optic. If there are fingerprints or greasy marks, you can slightly dampen the cloth with a cleaning solution safe for electronics.
4. Check for Moisture: After cleaning, ensure that no moisture is left around the edges of the lens, the emitter (if exposed), or any openings. If you find moisture, gently dab it with a corner of a dry microfiber cloth until the surface is completely dry.
5. Inspect Regularly: After cleaning, make a habit of inspecting the optic for any signs of wear or damage. Check the seals and ensure the optic is mounted securely.
By following these steps, you can maintain the clarity and functionality of your reflex sight, ensuring it performs well whether you’re at the range or using it in field conditions. Always refer to the manufacturer’s instructions for specific guidance related to your particular model, as some may have unique requirements or recommend specific cleaning products.
Even though most red dot sights are simple, these optics rely heavily on internal electronics, so it’s important to not let moisture or cleaning solution enter the optic. For more information, be sure to check out our red dot guide: [How Red Dot Sights Work].
How to Clean Binoculars
A good pair of binoculars can help you really experience the outdoors to the fullest. There are probably a hundred or so different reasons to own binoculars, which we’ve detailed heavily on this guide: [Why Everyone needs Binoculars: Uses and Buying Guide].
That said, cleaning your binoculars properly is essential to maintain their performance and longevity. Here’s a step-by-step guide to help you clean your favorite binoculars effectively:
1. Preparation: Gather the necessary cleaning tools such as a soft brush or air blower, a microfiber cloth, and a lens cleaning solution. Avoid using materials like paper towels or clothing as they can scratch the lenses.
2. Dust Removal: Start by removing any loose dust or debris from the lenses with a soft brush or air blower. Holding the binoculars upside down during this process helps prevent dust from settling on the lens surface.
3. Cleaning the Lenses: Apply a small amount of lens cleaning solution to the microfiber cloth. Gently wipe the lenses in a circular motion with the cloth, starting from the center and moving outward to avoid streaking and to ensure thorough coverage.
4. Drying: After cleaning, allow the lenses to air dry or gently dab them with a dry part of the microfiber cloth. Ensure that no fibers or lint are left on the lenses.
5. Cleaning the Body: Wipe the body of the binoculars with a damp cloth to remove dirt and fingerprints. If the body is very dirty, a little rubbing alcohol on the cloth can help clean it effectively without damaging the material.
6. Maintenance and Storage: Store your binoculars in a dry, cool place. Using a lens cap and storing the binoculars in a case can help protect them from dust and moisture. Regular cleaning after use in dusty or outdoor environments can prevent the buildup of grime and ensure a clear view.
7. Avoid Over-cleaning: Frequent cleaning can wear out the lens coatings over time, so it’s important to clean your binoculars only when necessary to maintain their clarity and performance.
By following these steps, you can ensure that your binoculars remain in excellent condition, providing you with clear and effective viewing.
How to Clean a Laser Rangefinder
Cleaning a laser rangefinder involves a few careful steps to ensure that the device remains in good working condition without causing any damage to its delicate components. Here’s how you can clean your laser rangefinder effectively:
1. Clean the Exterior: Using a soft microfiber cloth, gently wipe the body of the rangefinder. This removes fingerprints, dust, and other particles that can accumulate on the surface. For harder-to-reach areas or crevices, use a soft-bristled lens brush to carefully remove any debris.
2. Lens Cleaning: Apply a small amount of lens cleaning solution to a different part of your microfiber cloth—ensure the cloth is just damp and not wet. Gently wipe the lens in a circular motion, starting from the center and moving outward. This method helps prevent streaking and ensures that the entire lens surface is cleaned without leaving residues.
3. Drying and Storing: After cleaning, allow the rangefinder to air dry completely. Do not use heat to speed up this process as it could damage the electronics or optics. Once dry, store the rangefinder in a protective case to keep it clean and safe from environmental factors.
4. Regular Maintenance: Regularly check and clean your rangefinder, especially after use in dusty or outdoor environments. This prevents the build-up of dirt and ensures the device functions accurately when you need it.
Remember, do not use harsh chemicals, submerge the rangefinder in water, or use rough materials like paper towels for cleaning, as these can scratch the lens and damage the device. Also, avoid using excessive amounts of cleaning solution, as moisture can seep into the internal components and cause damage.

Conclusion
Maintaining the cleanliness of your high-performance optical devices is crucial for ensuring their functionality and longevity. By using the right materials, avoiding harmful chemicals, and following proper cleaning techniques, you can protect your optics from damage and keep them in top working condition.
Remember, the key to effective maintenance is not just about cleaning correctly but also knowing what not to use—such as avoiding gun cleaners and CLPs on lenses, which can cause irreversible damage. Regular, cautious cleaning will help preserve the quality and precision of your optics, ensuring that they continue to perform excellently in all your activities, from sightseeing to precision shooting.