Amongst the many optic options found within the ever-growing optic industry, reflex sights consistently remain one of the industry’s most popular additions. Renowned for their agility and quick target acquisition capabilities, they’re a solid pick for a multitude of applications ranging from simplistic recreation to more intensive competitive and duty applications.
By design, they offer versatility in a minimalistic package, and while you may think that shopping for one is as simple as a one and done purchase, it’s critical to recognize that there’s always a possibility to run into some issues with it eventually—user error or otherwise. Because of this, knowing how to overcome these challenges if/when they crop up is a key aspect of optic ownership.

Reflex Sight Basics
Before going too deep into the complexities of various reflex sight issues, it’s important to know what exactly reflex sights are. We go over this at length in our guide, “How do Red Dot Sights Work?”, but the term “reflex sight” encompasses multiple different optics, including open-emitter reflex sights, red dot sights, and holographic sights.
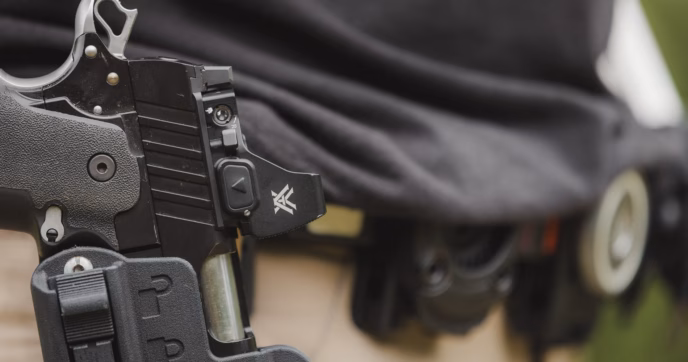
Open-emitter reflex sights, as their name suggests, use an open-emitter design that includes just one lens and an exposed emitter diode. Many of the open-emitter optics offered today come in the form of mini-reflex sights designed for pistols, though there are still some for rifles as well. Having an open design, they generally offer the widest fields of view compared to other reflex sights, and they’re typically lighter in comparison too.
Next are red dot sights, the tried-and-true optic that most often comes to mind upon hearing the phrase “reflex sight”. Red dot sights are characterized by their enclosed design and use of two lenses, giving them a more rigid optic body that fully protects the emitter diode from dirt and other debris. Despite having a narrower FOV due to their enclosed design, they’re still very agile, and they’re available in a wide range of sizes, such as full-size models designed for use on rifles, and smaller microdots designed for short-barrel rifles and PCCs. In the same vein, you can also opt for a pistol red dot sight as well.
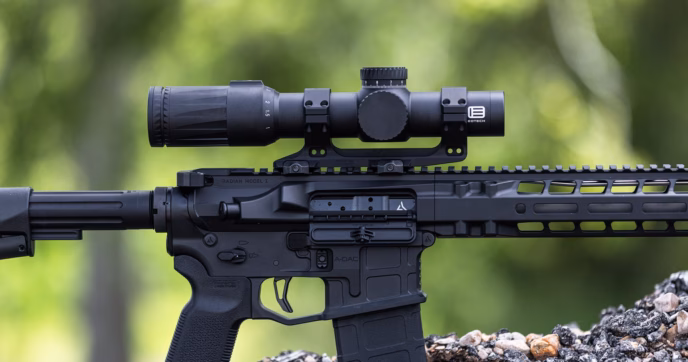
Holographic sights are the most unique reflex sight option of the three. Rather than bouncing light off one surface to create a reticle—like red dot and open-emitter reflex sights—holographic sights bounce the emitter’s projection off several surfaces to create a hologram image that floats between the optic’s lenses. This gives them multiple advantages, such as improved night vision performance and fewer issues with parallax shift. Plus, they’re exceptionally durable. Still, they tend to be bulkier due to the increased number of components, and because of their specialized design, they tend to be more costly as well.

Common Reflex Sight Issues
Despite the ominous sounding title, reflex sights are generally some of the most reliable optics around, but that doesn’t mean they’re completely free from having issues from time to time, especially if you’re new to running such optics. For the uninitiated, it’s common to run into one of many small issues ranging from misunderstanding their designs to improper mounting, all of which can be fixed in a short time.
Canted Lenses
Many new enthusiasts often take note of the canted front lens included on most reflex sights. While this might seem to be an issue at first, it isn’t. As we mentioned above, red dot sights work by collimating light and reflecting it back to your eye to form the reticle image. To do so, they need to have a canted front lens.
First-time red dot sight owners can sometimes unbox their optic, see the canted lens, and mistakenly believe it to be defective. But rest assured, this isn’t the case, and your red dot sight is ready to be mounted and zeroed.
Ghost Dots and Astigmatic Distortion
Another common sight issue users often run into are “ghost dots”. Ghost dots appear as if your optic is projecting multiple dots instead of just one, and they usually occur when the reticle emitter’s brightness level is set too high, causing its light to reflect off the rear lens in addition to the front. As you might expect, this can cause several problems when aiming, but luckily, it’s one of the easiest issues to correct, as all you need to do is lower your brightness level. Ideally, want your reticle to be bright enough to see without being too bright to the point where it starts to bloom or cause ghost dots to appear.
Similarly, enthusiasts with astigmatism can experience a multitude of reticle distortions from an overly bright reticle. Effects such as reticle bloom, smearing, and star bursting can become exacerbated if your reticle is too bright. If you aren’t sure whether the distortion is brought by astigmatism, the best way to check is to take a photo of your reticle with your phone. If the distortion is present in the picture, there could be a defect in the optic, if not, it’s astigmatism. Although astigmatism can cause issues when running a red dot sight, it’s still more than possible to use one if you suffer from the condition. We cover this topic at length in our guide on the best red dot for astigmatism, and we recommend giving it a look for some tips on overcoming distortions.
Lastly, lowering your optic’s brightness comes with the added benefit of achieving a longer lasting battery life. Now, modern reflex sight battery lives are already impressive, with some lasting upwards of 50,000 hours or even more. Still, there are many other methods for maximizing the battery life of your optics, but maintaining an optimal brightness setting is easily one of the most effective methods for doing so.

Red Dot Sight Calibration and Adjustment
Many new reflex sight owners often erroneously think that they’re “ready to go” right out of the box, requiring only the installation. But, just like any other optic, they need to be zeroed to be accurate.
Sighting in your Red Dot Sight
It’s easy to make mistakes and get frustrated when zeroing your optic, and although it seems daunting when you’re new to the process, it’s much simpler than it appears. Our guide, “How to Zero a Pistol Red Dot” goes in-depth on this topic, but the gist of it is as follows:
To zero your red dot sight, start by setting up a target at your intended zero distance—we recommend a 15-yard zero for handguns, and either a 25-, 50-, or 100-yard zero for rifles. With your target set up, make sure that you have a stable shooting position for repeatable results, put on both eye and ear protection, and load your firearm while keeping it pointed in a safe direction. Once your firearm is loaded, take aim, and fire three rounds at the center of the target, making sure that your reticle is on the bullseye of the target each time you fire—take your time and don’t rush the process.
Next, remove the magazine from your firearm and clear it, confirming both visually and physically that there isn’t a round in the chamber. Next, look at your target to see where your shots landed. The impact of your group will let you know how to adjust your optic. Each optic has turrets for adjusting windage and elevation, which shift your reticle within the optic. Adjust the windage and elevation of your optic so that they align with your grouping. Then, repeat the process and check to see where your next grouping lands, then continue doing so until your shots are lined up with your reticle, hitting the center of the target with no issues.
Improper Mounting
If you find that your optic isn’t holding zero after sighting it in, there’s a good chance that it isn’t mounted properly. Regardless of whether you opt for a rifle-sized red dot sight or a mini-reflex sight for your handgun, a common issue new enthusiasts face is improper mounting. Every optic has its own recommended torque specifications. If your optic is mounted too loosely, it won’t be able to reliably maintain zero, and the mounting screws/bolts might back out when firing, causing your optic to fly off your gun in a worst-case scenario. Conversely, if you thread the screws/bolts too tightly, you run the risk of cross threading them, stripping out the screw/bolt head, or snapping the head from too much force.
Fortunately, these issues can all be easily avoided. Start by cleaning your mounting surface to make sure it’s free of any debris. For mini-reflex sights, apply a medium strength thread locker to your mounting screws, and thread them into your mount or pistol slide either by hand or loosely with their required hex wrench. Next, simply tighten them down, alternating between them every turn to ensure they have even pressure—and once tight, you can torque the screws down to the manufacturer’s torque specs.
Rifle optics are simpler to mount, usually requiring only one cross-bolt that mounts to a picatinny rail surface. The same general rules apply though—apply medium strength thread locker to the cross-bolt, thread it through the optic mount, and tighten it down to the manufacturer’s torque spec.
Once mounted properly, you’ll need to re-zero your optic, and once you’ve done so, it will be able to maintain its zero with no issues while staying securely attached to your firearm.
Understanding Red Dot Sight Operation
As mentioned earlier, part of the appeal of reflex sights is their simplicity, a fact that extends to their controls. However, not every optic is created equal. Some use push-button controls and others use rotary knobs, so it’s important to know their differences and features before you opt for one over the other.

Push-Button Controls
Arguably the most popular control method, push button controls are used commonly among almost every reflex sight manufacturer. With push-button controls, the optic is typically turned on by either pressing or holding the brightness up or ‘+’ button, and they’re turned off by holding the brightness down or ‘-’ button for a few seconds. Depending on your optic though, it may come with motion activation and an automatic shut-off feature.
For instance, select Primary Arms Optics reflex sights feature their AutoLive® Motion-Sensing illumination technology and an automatic shut-off. With this feature, the optic will turn on automatically after being picked up, and it will automatically turn off after being stationary for a certain amount of time. This is a common feature on other optics as well, going by the name ShakeAwake™ for Holosun optics, and Motac™ for SIG Sauer optics.
Even further, many modern reflex sights can cycle through multiple reticle configurations, a feature that’s controlled by various combinations of the brightness control buttons. For instance, on optics like the PAO GLx® MD-21s Microdot, you can cycle through different reticle options by holding down either the ‘+’ or ‘-’ button for three seconds. This is the case for many optics, but the button combos and timings can vary. As such, we recommend reading the owner’s manual that comes with your optic for the most exact info on how it works.

Rotary Knob Controls
Rotary knobs are featured on optics like the Primary Arms Optics SLx® MD-25 Rotary Knob Microdot, the Aimpoint® CompM4s™, CompM5™, and PRO™, and the Trijicon MRO—and they’re some of the simplest reflex sight controls available. To use them, turn the knob to the brightness setting of your choice, and you’re good to go. Being so simple, they can be adjusted quickly, making them an excellent choice for those interested in a simpler optic setup.
There are some downsides to these controls, though. For starters, the knob itself can add some extra bulk to your optic, potentially giving it a larger footprint in the process. Additionally, their manual operation means you’ll forego advantages commonly found on push button optics like automatic shut-off and motion activation unless you have a specialized control knob. As such, you’ll need to remember to turn your optic off after use, lest you run down your battery unintentionally. Also, rotary knob-controlled optics don’t usually have the ability to cycle through multiple reticles. Despite these limitations, they’re still a solid choice for simplicity’s sake alone.
Red Dot Sight Selection and Maintenance
You won’t be hard-pressed to find an assortment of top-tier reflex sights from various brands, as there is a plethora of high-quality brands to pick from. For instance, Primary Arms Optics, Trijicon, EOTech, Holosun, SIG Sauer, and Vortex Optics are some of the most prominent names in the industry, with each one producing their share of high-quality rifle and pistol reflex sights. It can be a bit daunting at times to choose just one when there are so many options though, so we recommend taking your time to research each model and to see if it’s the right fit for you. And once you’ve chosen your optic, you’ll need to know how to properly maintain it.

Optic Maintenance
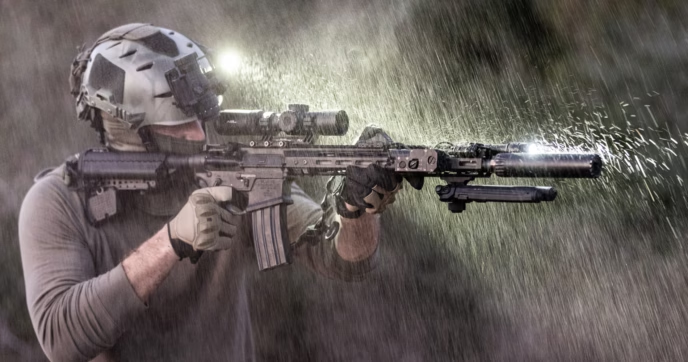
Properly maintaining your reflex sight is imperative to ensuring it stays in working condition for as long as possible. When used in the field or at the range, your optics are going to be exposed to a variety of debris and detritus that can seriously hinder their performance. And if you leave them dirty for too long, your optic’s performance might suffer as a result. As dirt and other debris builds on/within your optic, your reticle can diffuse and appear blurry, or the debris can cause secondary reflections, distorting your reticle image even further.
These issues are especially common after running carbine courses, competitions, or other duty and training applications. As such, it’s important to make sure you routinely clean your optics, as necessary. Our guide, “How to Clean your Optics” goes in-depth on this topic, but we’ll sum it up for you below:
When cleaning your reflex sight, you’ll want to make sure that you wipe any dirt, dust, or debris off the optic gently so as not to mar your optic body or lenses. A can of compressed air or a soft brush can do this effectively, but a clean cotton wipe works well too. When cleaning the optic body, make sure to inspect any threaded components such as the windage/elevation turret covers and battery caps. If they need to be cleaned, make sure they’re free of moisture before threading your caps back on.
To clean your lenses, it’s best to use either a microfiber cloth or a dedicated lens cleaning wipe with lens solution pre-applied on it. Be especially careful when cleaning dirt and dust off your lenses—they can easily be scratched if you aren’t careful, which can lead to clarity and light transmission issues. With your optic clean, you’ll be ready for your next range session.
Ultimately, the frequency in which you clean your red dot sight is up to you. You don’t necessarily need to give your optic a deep clean every time you hit the range, unless you’re doing some intensive training. If you clean your lenses every so often and brush off any dust or dirt off the body, when necessary, they’ll be ready to use whenever you need them.
Red Dot Sight Accessories

Red Dot Magnifiers
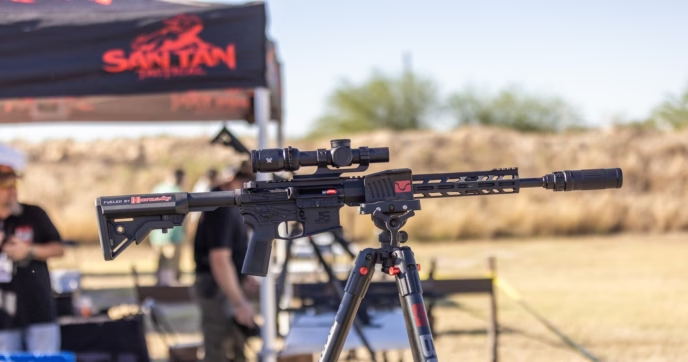
A common optic used in conjunction with reflex sights are red dot magnifiers, which are used to extend the usable range and overall utility of your optic. At their core, a magnifier is essentially a prism scope without a reticle, coming with a fixed magnification level. Most commonly, they’re available in either a 3x, 5x, and 6x configuration, allowing you to more effectively engage targets at far-off distances without having to switch out to another optic entirely. Also, magnifiers are fairly brand-agnostic, so you don’t have to match brands to get a good red dot and magnifier combo.
While effective, just like how you can run into issues with a reflex sight, it’s possible to have issues when using a magnifier as well.
Common Magnifier Issues
Arguably, one of the most common issues people run into with magnifiers is a blurry sight picture. This is most often because they haven’t properly adjusted the diopter ring. Many magnifiers, such as the PAO SLx™ Micro Magnifier, come with a diopter ring that adjusts its focus. If it takes a second for your eye to pull your magnified reticle picture into focus when aiming at a blank background, your diopter isn’t adjusted to your eye.
Turning your diopter ring counterclockwise, adjust it all the way out until you feel resistance, then adjusting clockwise, turn it so that the diopter is roughly halfway back to its starting position. With it in this position, adjust your diopter ring until you’re able to immediately open your eyes and focus on your reticle without needing a moment for your eye to pull it into focus. Once you’re at this point, the diopter is set to your eye. Afterwards, you don’t need to do this, but we recommend using a marker to place a witness mark on the optic body and diopter ring for quick adjustments if it ever accidentally comes out of alignment.
Additionally, magnifiers most often come with a hinging mount—usually a side- or top-swinging one—allowing you to quickly switch between magnified and un-magnified use with ease by swinging it out of the way. However, if you don’t have the right mount height on your magnifier, you won’t get a proper target image. As such, it’s imperative to ensure that your magnifier mount height matches your red dot height. So long as the magnifier height matches your red dot riser height, you’ll be able to use a magnifier with no issues.
If you’re confused as to what height is best for your setup, we recommend checking out our guide, “How to Find the Best Height for your Red Dot”.


Conclusion
For those who are new running reflex sights, it’s imperative that you know how to address different issues that you may experience when owning them. If you don’t know how to take care of these issues when they arise, they can have a serious impact on your overall shooting experience. From choosing the right reflex sight, to understanding how it works, and knowing how to properly take care of it, there’s a lot to consider.
Looking at the several types of reflex sights alone, you have multiple options to pick from, each coming with their own unique features and controls. Once you’ve chosen the right optic that adequately meets your needs, you’ll need to make sure it’s not only zeroed properly but also calibrated to best suit your environment. Additionally, we can’t stress the importance of proper cleaning and maintenance enough, and if you plan on running accessories like a magnifier alongside it, it’s imperative that you have the right mount height for both optics.
As overwhelming as all of this can appear, getting familiar with your optics and understanding how to use and take care of them to the best of their ability will ensure that you’re ready for whatever challenges lie ahead. And if you take time to care for your optics and accessories, you’ll be good to go.