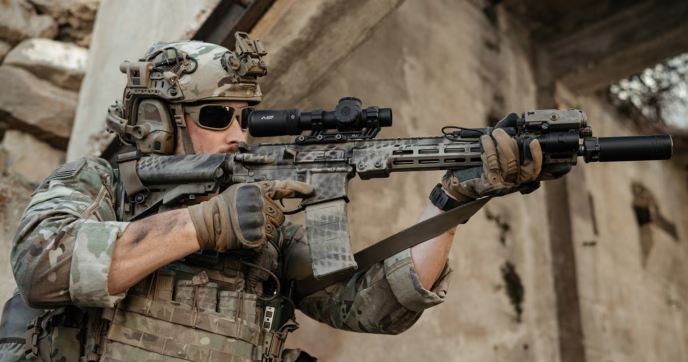
It’s no secret that tactical guns and gear are more popular than ever. The venerable AR-15 is now one of the most ubiquitous rifles in America, and equipment like battle belts, plate carriers, and body armor belong right alongside it. For many, though, the ultimate piece of tactical equipment is night vision.
Night vision devices, often abbreviated to NVDs, NVGs (Night Vision Goggles), or NODs (Night Observation Devices) are usually the most expensive piece of technology in a modern gunfighter’s toolkit. Often ranging from $2,000 to over $20,000, night vision is a substantial investment and requires a good deal of training to master, but it can offer an advantage unlike any other: control, even in near pitch darkness.
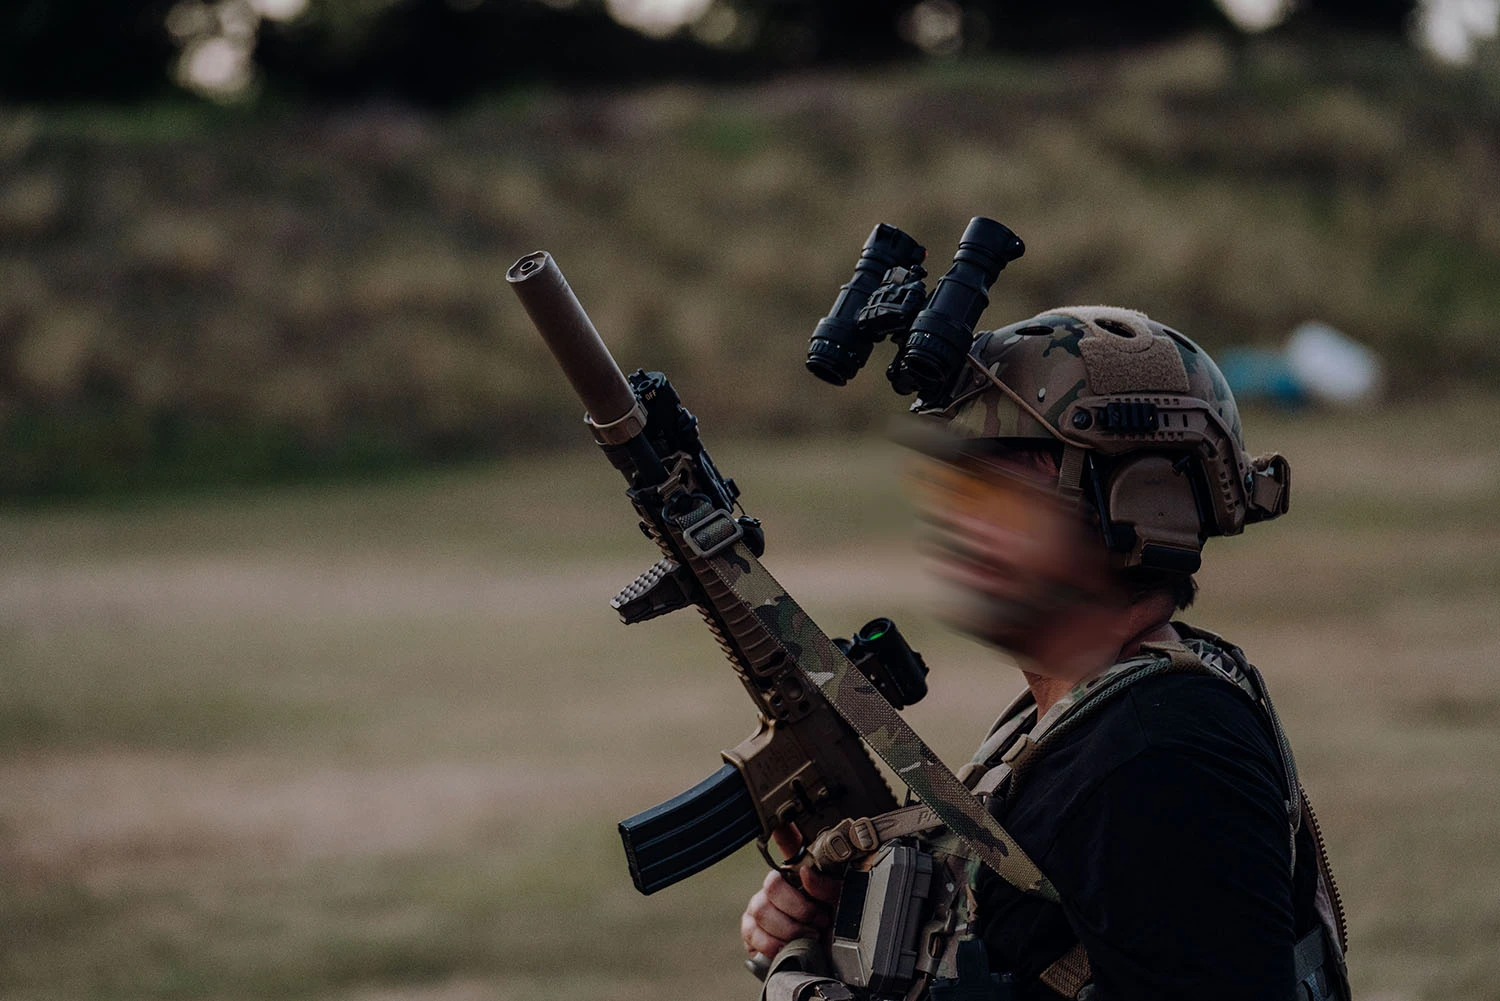
WHY BUY NIGHT VISION?
There are a lot of reasons to invest in a quality night vision device, and not all of them are for combat. Night vision is popular with both nighttime photographers and stargazers, as well as hikers and campers looking to experience nature under the night sky.
For our purposes, though, we’ll primarily be looking at the advantages of night vision technology for hunting, home defense, and similar applications.
For home defense and combat, the benefit of night vision is obvious. Darkness and visibility have been the primary elements of survival since the very beginning. Firearms have only made these factors even more important since you can now engage any target within your line of sight.
In this context, the tactical advantage of night vision is potentially insurmountable. And because many attackers choose to act at night, when they are least exposed, the benefit of night vision is even more pronounced.
For hunting and pest control, night vision is such a massive advantage that it borders on being unfair. Animals, both predators and prey, know that they are harder to spot at night; this makes them more likely to leave cover to cross an open field or venture near a house.
Many predators and nuisance animals, like coyotes and weasels, are nocturnal or crepuscular. These factors combine to make night hunting much easier and more efficient than trying to track pests and prey during the daylight.
CAVEAT EMPTOR
There are a lot of night vision devices on the market, and not all of them are equal. When shopping for night vision, it’s important to know that you usually get what you pay for. A $600 device will not provide the same features or clarity as a $4000 one. Often, it’s not even the same technology.
That said, you don’t have to drop a five-digit sum on a night vision setup; there are some applications where basic night vision will do just fine. When buying night vision, it’s important to be realistic with both your requirements and your budget. A higher-quality unit with fewer features might serve you better than a cheap pair of goggles with all the bells and whistles.
DIGITAL VS ANALOG NIGHT VISION
There are two types of modern night vision technologies: digital and analog. You’ve probably seen these terms used to describe other technologies before, but don’t jump to any conclusions: digital isn’t the de facto winner here. In fact, digital night vision is generally inferior to analog—at least until digital technology can catch up.
DIGITAL NIGHT VISION
Digital night vision devices are essentially specialized video cameras. These devices rely on infrared (IR) light, a band of radiation that exists outside the visual spectrum. While IR light is normally undetectable by humans, many animals (and cameras) have special photoreceptors to see IR light.
Most digital night vision units combine a video camera, a simple computer, and a small display screen into one unit. The concept is straightforward: the camera detects IR light, the computer interprets it, and the display shows you the resulting image. This entire process happens almost instantaneously—but not quite, which is where the first limitation of digital night vision appears.
It takes time for an image to make its way through the system—sometimes up to 1-2 seconds. This means that the image you see lags behind reality. It’s not a big deal for most recreational use, but in combat, a half-second delay can be fatal.
Even for hunting, that delay can be a major detriment. If your target is moving, then the image you’re seeing (and using to aim) is a few seconds late. In this case, you’ll need to anticipate the animal’s movement and your device’s delay to lead your target.
The second drawback to digital night vision is that it typically requires an infrared illuminator to be meaningfully effective. Most digital night vision doesn’t work very well on its own. This isn’t a big deal for hunting or hiking, but for tactical applications, you must consider your exposure. If your opponent might have night vision, then an infrared illuminator will advertise your position just like a flashlight would.
ANALOG NIGHT VISION
Analog night vision is the preferred option for most professional users. It’s also the oldest form of night vision, with the first devices dating back to World War 2.
The science behind it is complex. We could write another 8,000-word blog to try and describe it, but that’d just be scratching the surface. Fortunately, you don’t need an optical engineering degree to operate night vision goggles. Just know that analog night vision uses a very advanced device called an image intensifier. This image intensifier collects photons, converts them to electricity, amplifies the electricity, then converts the result back to visible light via a phosphor screen. The quality and clarity of that visible light depend on the specs and design of the image intensifier.
Because this process occurs nearly at the speed of light, there’s no image lag like there is with digital night vision. Intensifier tube night vision also works better with ambient light, providing a useful image in most situations, even without an IR illuminator. These two features combined make analog night vision much, much more useful for combat than digital night vision.
Of course, analog NODs can still detect infrared illuminators and aiming devices. In fact, you’ll need one if you plan on running in 100% absolute darkness. But analog night vision gives you greater flexibility to run with or without it depending on the ambient light level.
Analog night vision is not without drawbacks, though. Because the intensifier tubes amplify light, exposing them to bright light can cause burnout, permanently damaging the tube.
In older models, this meant permanent damage was possible if someone even flipped on a light switch. Today’s NODs have ways to mitigate this risk, but they can still be damaged by a bright enough light or laser. Suffice to say, you do NOT want to expose your tubes to direct sunlight. Intensifier tubes are the most expensive part of analog night vision, and with the best tubes costing thousands of dollars, you do not want to see your investment destroyed by a foolish mistake.
As you might surmise, analog tube night vision is usually more expensive than digital night vision. An entry-level digital handheld or scope may cost less than $1,000, while quality intensifier tubes start at twice that—and that’s for one tube. If you want complete ‘dual tube’ night vision, you’ll need two intensifiers, a device housing, and supplemental optics. That’s not including the cost of additional accessories and gear, which are often priced for the ‘professional budget.’
Despite this cost, we still highly recommend analog night vision for any tactical application. While digital night vision is fine for hobby activities and sometimes even for training, there is a reason why professional teams overwhelmingly choose analog. Until digital night vision technology improves, the drawbacks are simply too high.
For that reason, the rest of this article will focus on analog night vision devices.
GENERATIONS OF NIGHT VISION
There are three ‘generations’ of analog night vision, and each represents a significant advancement in performance over the last. These generations classify the intensifier tubes themselves, so you may see the same housing used over multiple generations (e.g., a PVS-14 monocular may have either a Gen 2 or a Gen 3 tube.)
Before we break down the differences between the three generations, let’s take a brief look at what came before: our ‘generation 0.’
GENERATION 0
The very first iteration of night vision, Gen 0, started in the 1930s and saw some limited use during World War 2. The technology was in its infancy and provided little to no passive amplification of ambient light. Instead, soldiers had to carry a heavy infrared light source to function on any practical level.
These kinds of night vision devices are no longer produced and should be preserved as antiques rather than fielded as obsolete combat tools.
GENERATION 1
This was the earliest generation of what we would consider “practical” night vision. The starlight scopes used by American soldiers in Vietnam fall under this category.
Gen 1 night vision can amplify ambient light enough to provide a usable image without an infrared illuminator under certain conditions. For night vision devices of this era, at least a half-moon is required for practical function; use in caves, under a forest canopy, or indoors, will typically require an illuminator.
This is where the antiquated name “starlight scope” came from—they only worked if there was adequate starlight.
Even under ideal conditions or when used in conjunction with an illuminator, first-generation night vision had issues with image clarity as well as distortion or blurriness around the periphery of the lens.
Gen 1 night vision is no longer commonly manufactured but is still available as military surplus equipment. Most of the available Gen 1 devices are bulky and provide limited functionality, but they are the cheapest form of analog night vision available.
Unlike later generations, Gen 1 night vision has a short service life. Gen 1 tubes may provide a thousand hours of useful function before needing replacement.
GENERATION 2
Gen 2 is the oldest generation of night vision still in common production. This generation represented a marked improvement in image clarity and brightness, as well as a massive bump in service life. An average Gen 2 device could provide up to 5,000 hours of use.
Second-generation NVDs resolved many of the distortion issues seen in Gen 1 devices and are usable in most circumstances without an IR illuminator.
Gen 2 night vision is what we would recommend as the cheapest night vision option for tactical applications. While not as effective as the latest tech, Gen 2 night vision devices offer sufficient capability at a significant discount.
GENERATION 3
Gen 3 night vision is the latest and greatest phase of night vision technology. You may see some devices sold as Gen 3+ or Gen 4, but neither of these terms is officially recognized by any military.
This generation of night vision can provide up to 10,000 hours of service life and offers a significantly clearer and brighter image than previous generations, enabling target identification at increased distances.
Most professional teams use Gen 3 night vision devices.
NIGHT VISION TUBE OPTIONS
When shopping for night vision, there’s more to selecting a tube than just picking which generation you can afford. Even before getting into minutiae like individual specification values, there are a few major options you’ll need to choose from.
GREEN VS. WHITE
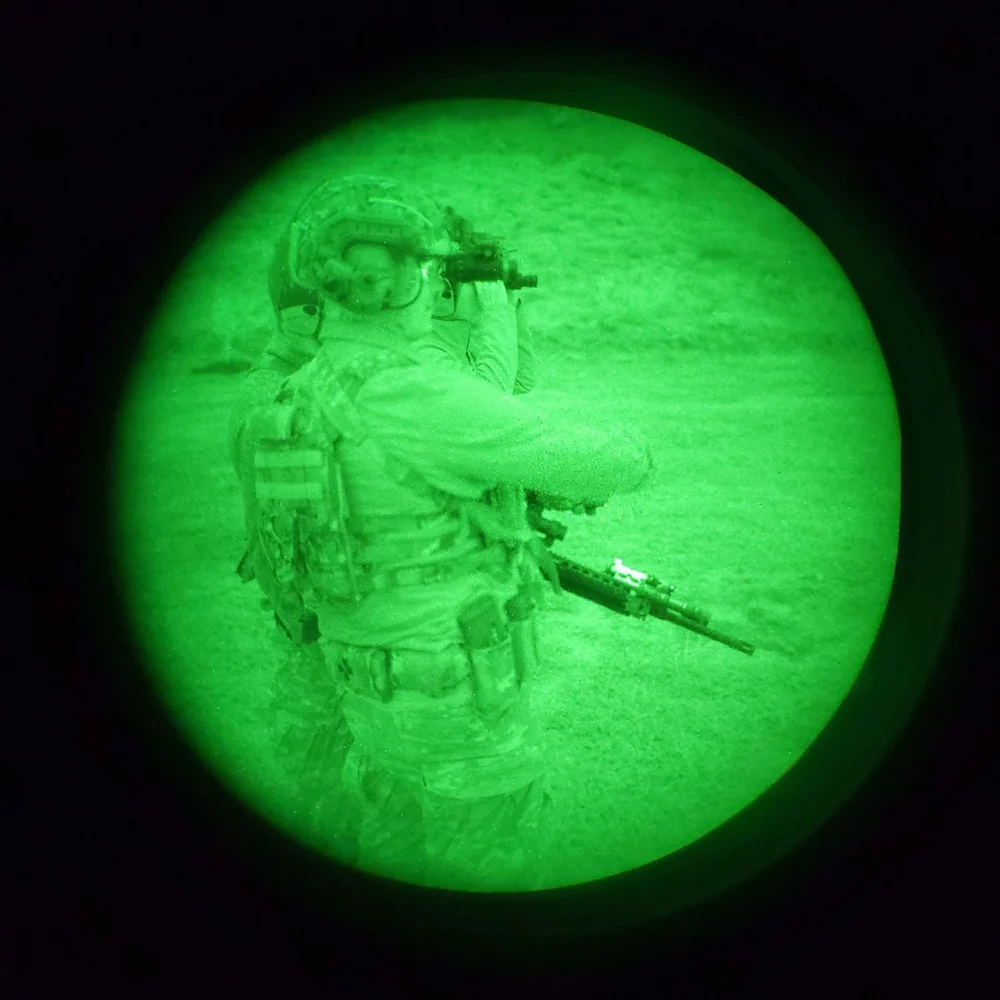
When most people think about night vision, they picture a grainy green image like in movies and games. While Gen 3 tubes are clearer than most people would expect, the green hue is mostly correct.
Most analog night vision has a green image because of the type of phosphor used in the image intensifier tubes. This type of phosphor was originally chosen because the human eye can discern more individual shades of green than any other color, which theoretically would make it easier to identify shapes, objects, and targets while using NODs.
Green light also preserves our natural night-adapted vision better than white light, allowing users to adapt to the darkness quickly if they have to remove their night vision.
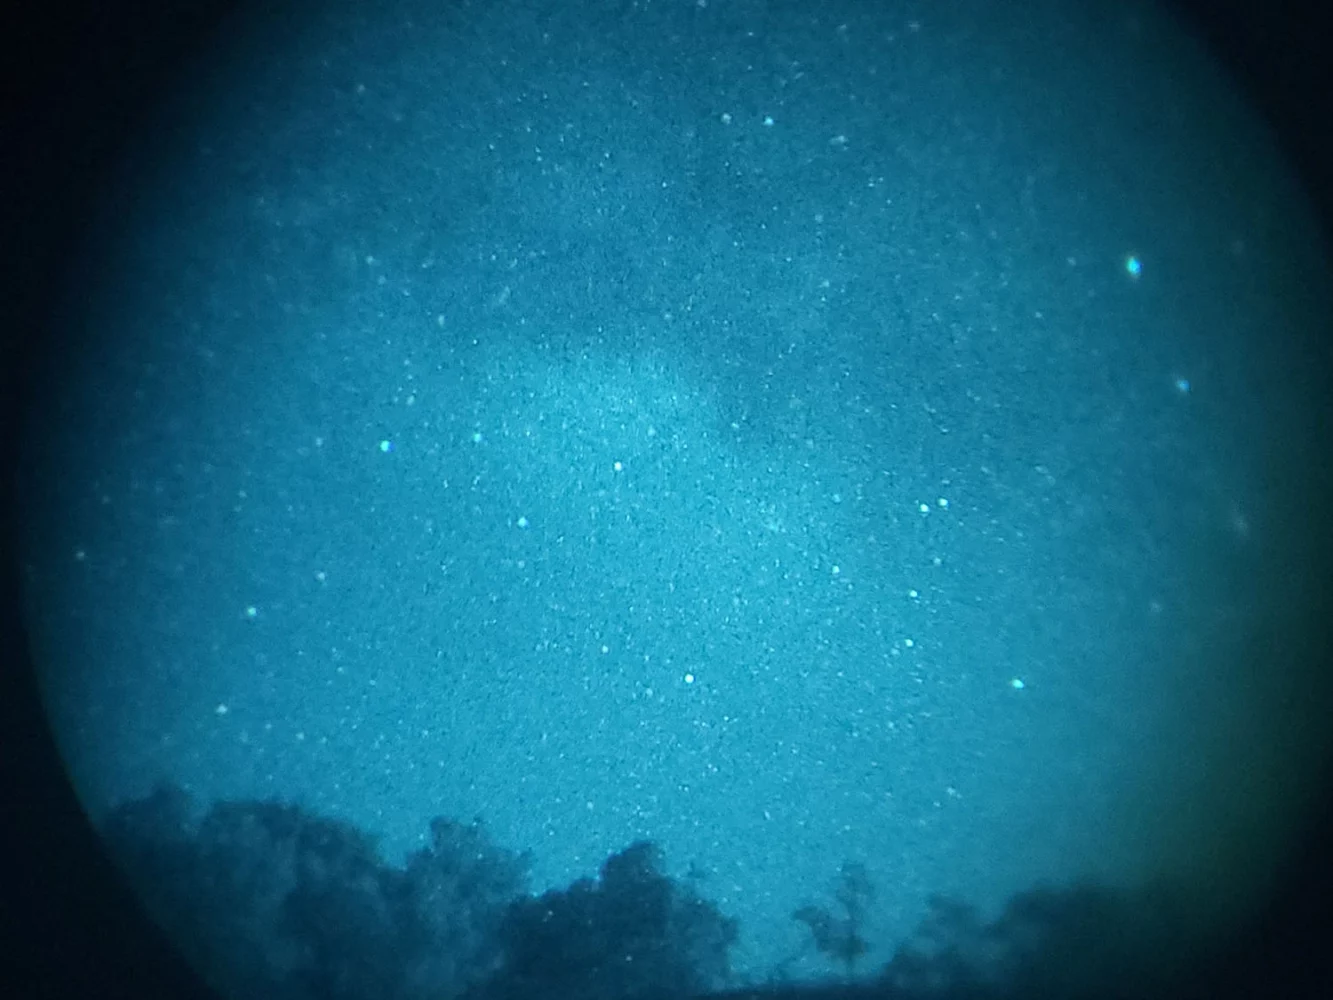
However, modern night vision has come a long way from its grainy, low-resolution beginnings, which is why the best devices now use white phosphor tubes. These tubes produce a softer, blue-tinted image that many find to be clearer and brighter than green.
Another benefit of white phosphor tubes is fatigue. If you’ve ever spent too long in front of a TV or computer screen, you’re probably familiar with eye strain. With night vision, the “screen” is only a few inches from your eye, so eye strain is a common issue.
Another benefit of white phosphor tubes is fatigue. If you’ve ever spent too long in front of a TV or computer screen, you’re probably familiar with eye strain. With night vision, the “screen” is only a few inches from your eye, so eye strain is a common issue.
White phosphor tubes have increased in popularity significantly in recent years, but they remain more expensive and less available than green phosphor tubes. If you have a chance to run night vision before you buy, we recommend trying a green set to determine whether the strain will become an issue for you.
FILMED VS. FILMLESS
When purchasing a third-generation night vision device, you’ll also have to choose between filmed and filmless.
The presence of an ion barrier film inside an intensifier tube is one of the major improvements that allowed Gen 3 tubes to increase their service life over second-generation tubes. Unfortunately, a side effect of this design was an increase in image noise.
Since Gen 3 overall had a superior image compared to Gen 2, the increased noise created by the film was a non-issue and well worth the improved longevity.
However, technology has continued to improve since the early days of Gen 3, and modern intensifier tubes are now available in a filmless configuration without compromising the service life.
Compared to older filmed tubes, filmless tubes have less noise and higher average specs. That’s not to say that they are unequivocally better; there is some overlap, and the best filmed tube on the market will still outperform the worst filmless.
To complicate matters, several manufacturers are now offering “thin-filmed” tubes, which use an ion barrier film that’s significantly thinner than earlier Gen 3 tubes. These thin-filmed models split the difference between filmed and filmless.
As of this writing, only one company, L3Harris, can produce filmless Gen 3 intensifier tubes. With the best possible specifications and a limited supply, these tubes are obviously more expensive than more common filmed tubes.
Is the increased performance offered by filmless tubes is worth the additional expense? It really comes down to the mission and budget. As we’ve repeated throughout this article, self-defense equipment is not space for cutting corners. If you believe night vision may play a role in your well-being, you may conclude that the best is worth it.
It’s also worth noting, though, that most of the NVDs purchased by the military are thin-filmed, as they meet all current specification requirements.
AUTO-GATING
Regardless of the generation or specifications of the tube, we recommend choosing one equipped with auto-gating. Auto-gating tubes allow the photocathode to perform at peak voltage while offering protection from sudden light sources.
Obviously, when you’re shelling out thousands for great NVGs, it’s good to know that one careless burst of a flashlight won’t compromise your equipment.
WEAPON MOUNTED VS. HEAD-MOUNTED
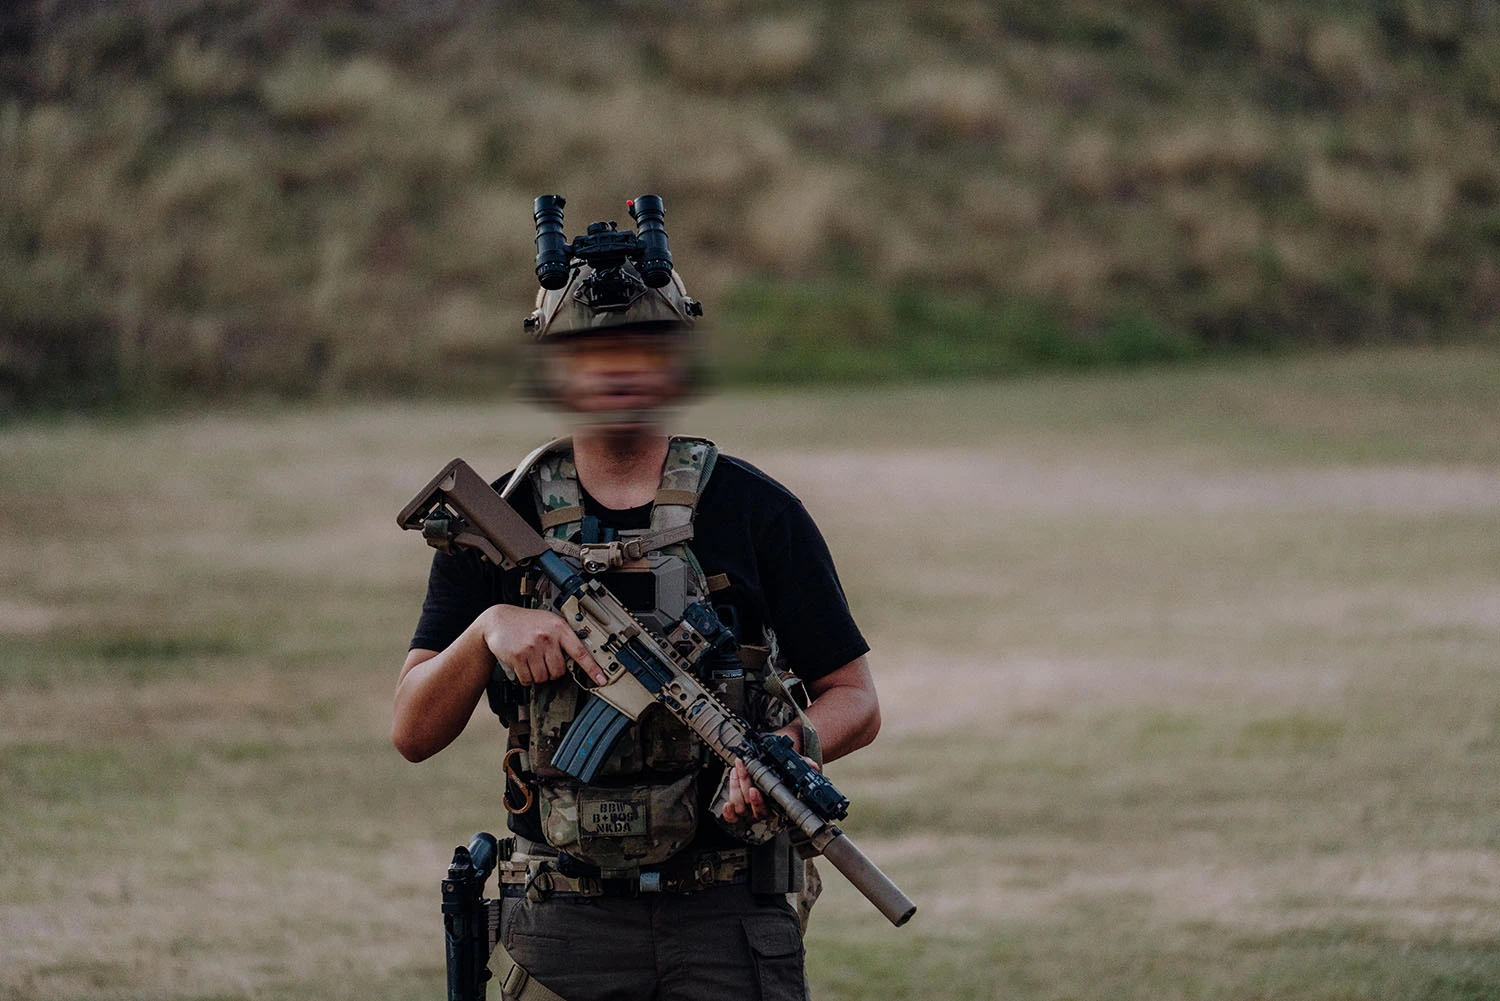
There are a variety of different ways to use night vision devices, but for our applications, it essentially breaks down to weapon-mounted or head-mounted. Handheld devices are sometimes used by the military and police for reconnaissance but offer little in the way of benefits besides simplicity and cost.
Besides, if you need a handheld device, you can always disconnect your night vision from your rifle or helmet. You cannot, however, clip a handheld to your face and achieve the same result.
Head-mounted night vision setups are the most popular by a wide margin. Having your NODs attached to a helmet or skullcrusher (a type of standalone harness that allows NVGs to be worn without a helmet) provides the most flexibility.
With this setup, wherever you turn your head, your night vision follows. It’s extremely intuitive to navigate with, although users will require some training to get used to the lack of peripheral vision. It’s also easy to switch between using and stowing your night vision with this setup, as most mounts allow you to flip your NVGs up out of the way.
The downside to helmet-mounted NODs is in aiming. Having a hefty device dangling in front of your face can complicate your sight acquisition. There are some solutions to this, such as infrared aiming lasers, extra-tall mounts, and piggyback optics, but we’ll get into those a bit later.
Weapon-mounted night vision is the second most common setup. This is more common on civilian firearms—especially hunting rifles—but is used to a limited degree by the military as well. Usually, this comes as a clip-on unit, which attaches in front of the primary optic. Alternatively, it could be an all-in-one scope that provides both night vision and an aiming reticle.
The advantage of a weapon-mounted night vision setup is ease-of-use; weapon manipulation is essentially the same as with a traditional riflescope. It’s also much easier to use with high-magnification scopes and precision rifles, which is likely why military weapon-mounted NVD setups are commonly found on sniper rifles.
However, weapon-mounted night vision is very limited in capability. Since your NVD is attached to your firearm, it’s impossible to look at anything through your night vision without pointing your rifle at it. This makes it essentially impossible to use for navigation or observation.
Weapon-mounted night vision is still practical in certain circumstances, though, especially when supported by another device for navigating and observation. One application is in nighttime hunting and pest control, where it’s become common to use a handheld thermal optic to scan for game, then deploy a rifle with a night vision scope to take the shot.
Overall, helmet-mounted night vision is the optimal choice for most users, and so we’ll focus primarily on that configuration. However, if you’re looking for a night vision device for a specific task like nighttime hunting, consider a rifle-mounted setup as well.
SINGLE TUBE VS. DUAL TUBE
Once you’ve selected the type of setup you want, it’s time to look at actual night vision units.
Most head-mounted night vision falls into two categories: single-tube and dual-tube. There are outliers, such as quad-tube panoramic NVGs, but they’re very hard to find and prohibitively expensive for most users.
SINGLE-TUBE NIGHT VISION
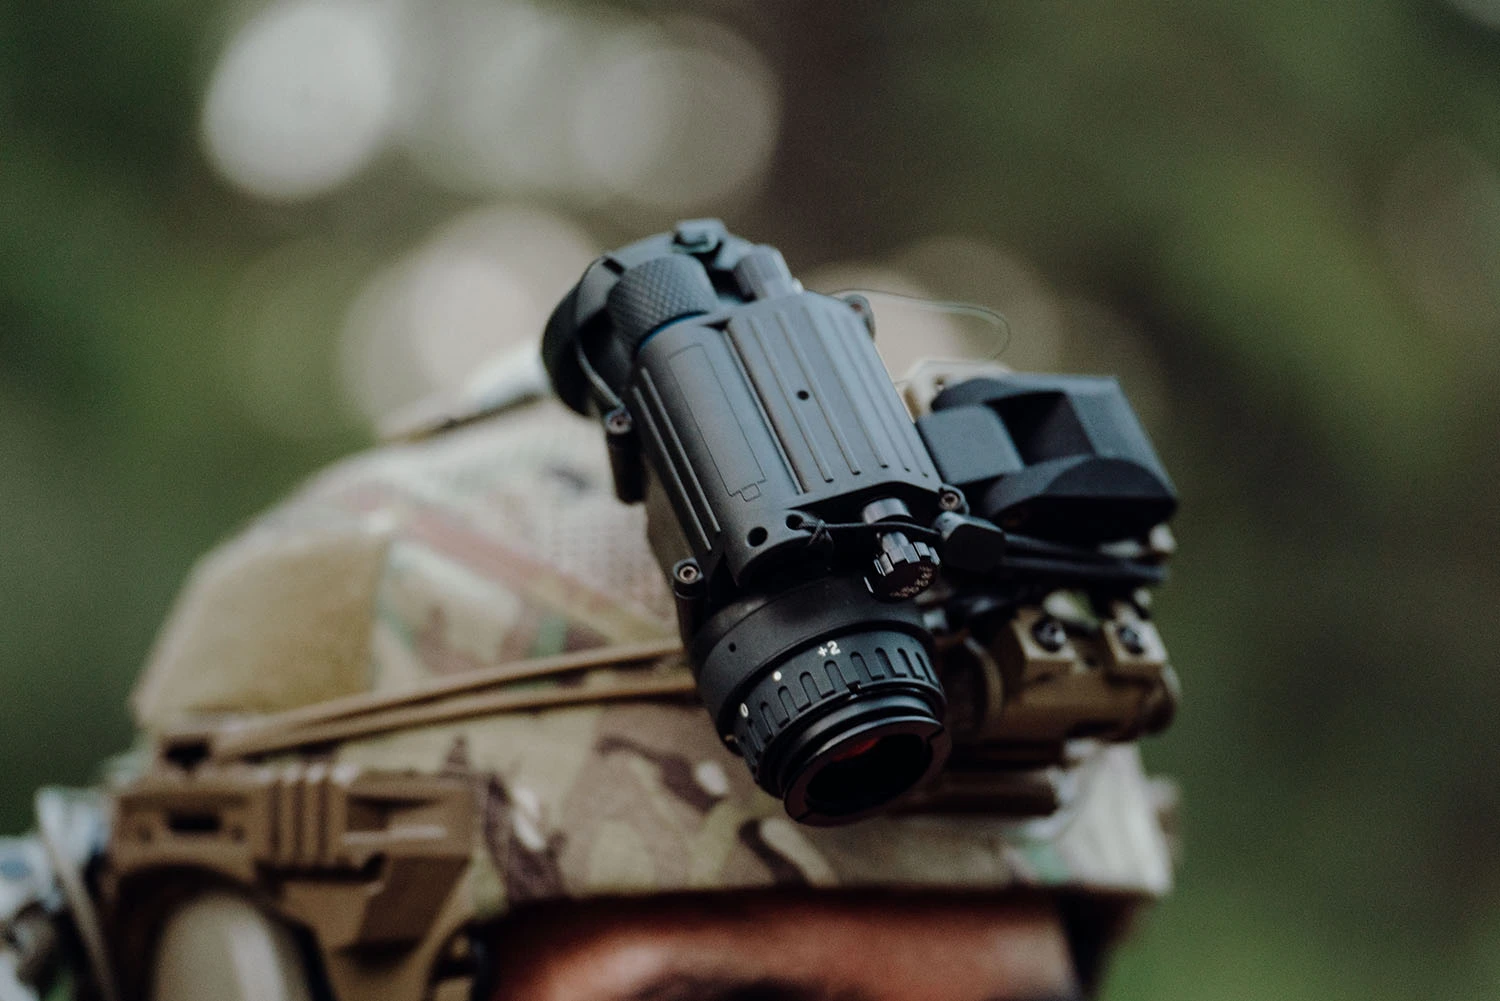
As the name suggests, single-tube night vision devices use only one intensifier tube. In most cases, this means a monocular, which provides night vision for a single eye, though there are some historical exceptions like the now-obsolete PVS-7.
Single-tube monoculars are usually the cheapest form of modern 3rd-generation night vision for obvious reasons. They’re also lighter than most dual-tube systems. Unfortunately, having only a single eye with night vision can compromise your depth perception, making some tasks more challenging.
Still, there are certain benefits to only having one eye exposed to night vision. Having one eye unaided gives you a better sense of ambient light conditions around you. You’ll also have one eye fully acclimated to the darkness, which can be important if your night vision is disabled or has to be stowed.
DUAL-TUBE NIGHT VISION
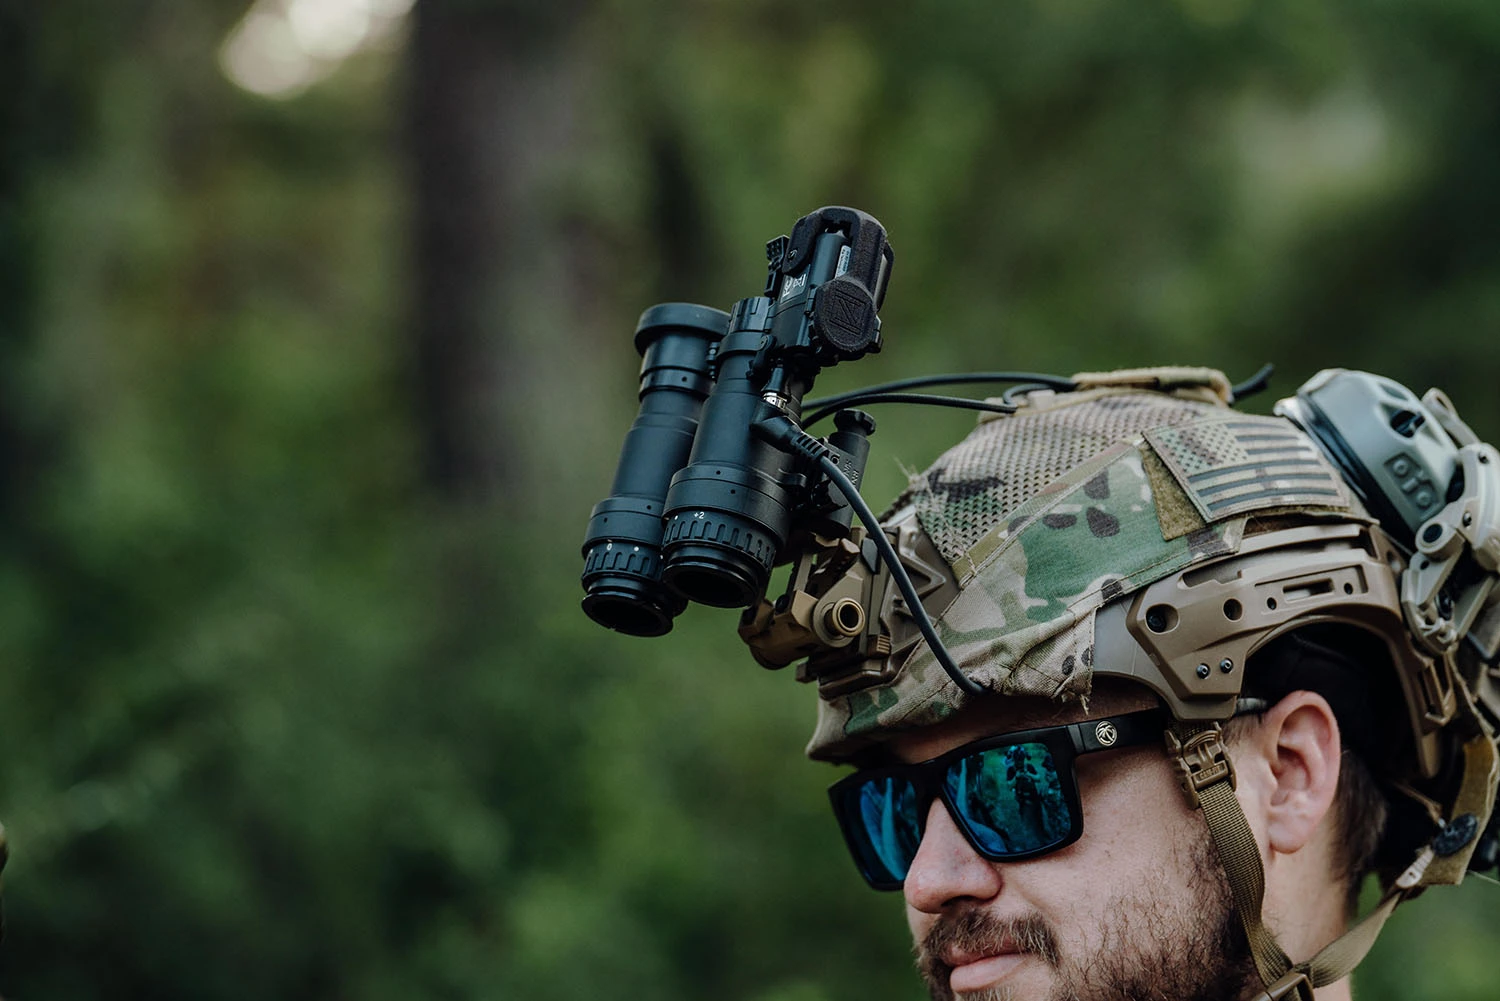
Dual-tube NVGs are the gold standard of civilian helmet-mounted night vision. This type of device employs two image intensifier tubes—one for each eye. Being able to use both eyes makes tasks like navigating and driving substantially easier and improves your situational awareness.
They’re also much more intuitive; your brain has spent your whole life working with two eyes (probably.) Suddenly switching to just one is a huge curveball. While you can learn to do most tasks with a night vision monocular, it will be much easier with dual-tube NVGs.
POPULAR ANALOG NIGHT VISION HOUSINGS
There are a lot of different night vision platforms out there. Some are standardized, such as the MIL-SPEC PVS-14. Others are proprietary to only a single manufacturer.
While we can’t cover every housing on the market, we’ll look at the pros and cons of today’s most popular options.
PVS-14
The most common night vision device by a large margin, the PVS-14 is a versatile, lightweight monocular available from a variety of different manufacturers in nearly every tube configuration. There are plenty of mounting solutions for it, including some that mount directly to your firearm, though it should be noted that the PVS-14 is not typically rated for recoil.
While the PVS-14 is ostensibly standardized, there are several manufacturers that make their own version, often with a slightly different name and minor variations to the design. It’s worth checking over the description and specifications of the specific device before buying it.
The PVS-14 is a great entry-level option. It’s the most budget-friendly on our list and provides much of the same capability as a dual-tube setup.
RNVG
The RNVG is one of the most popular dual-tube NVG units currently on the market. The acronym stands for Ruggedized Night Vision Goggles, and when they say ruggedized, they’re not kidding. RNVGs are some of the toughest night vision goggles available, made mostly from high-strength aluminum. RNVGs are also designed to have as few failure points as possible, which means fewer moving parts and hinges.
Of course, this means the RNVGs aren’t as adjustable as many similarly priced polymer housings. RNVGs are adjustable for interpupillary distance, which lets you fine-tune the position of tubes in relation to the center of your eyes, but that’s about it.
Unlike other dual-tube designs that allow users to flip or rotate one tube out of the way, the RNVG is an all-or-nothing system—either you have it flipped down over both eyes or flipped up and stowed. This makes it somewhat bulkier when stowed compared to other models.
EOTECH BINONV & BINONV-C
The EOTech BinoNV housing is one of the newest polymer housings on the market, offering articulating eyepieces so that you can rotate one tube out of the way or flatten the entire night vision setup against your helmet when stowed.
Those articulating eyepieces also feature an automatic cut-off to deactivate each individual tube when rotated away from your eye, reducing visual profile and saving battery at the same time. Of course, with the BinoNV’s built-in LEMO port, you can always connect an off-board battery for maximum runtime.
The BinoNV housing is also offered in a slightly more compact variant: the BinoNV-C. This system uses 16mm tubes, slightly reducing profile and weight without compromising on optical performance. The BinoNV-C housings will cost you slightly more, however, so you’ll want to consider your individual needs when choosing between the two.
Either way, you’ll be getting a great system that comes with many of the most sought-after features on the market. Just make sure you’re getting good tubes to go with them—and always try to see the spec sheets before you buy.
DECIPHERING A SPEC SHEET
Any intensifier tube-based night vision you buy will come with a spec sheet. This is basically just a list of different metrics that are used to assess the quality and performance of a tube. In some cases, you may be able to see a spec sheet before purchasing, but first, you’ll need to know how to read it, and what it all means.
FOM
This is a hot topic that gets a lot of lip service but isn’t as vital as you might think. FOM stands for Figure of Merit. It’s basically a ballpark metric that tries to quantify the overall performance of the tube with a single number by multiplying SNR times tube resolution.
This metric is useful for broad comparison, but it can also be misleading. If both the SNR and tube resolution (sometimes written as LP/MM, or line pairs per millimeter) are near the middle of their respective ranges, then FOM is a fair representation of image quality.
Specs aren’t usually that consistent though, and imbalances can affect the way you interpret FOM. For example, if the SNR is very low, but the tube resolution is very high, you can have a tube with a very good FOM despite producing a less desirable image. You could also have outlying spec issues that aren’t covered by FOM like EBI or Halo. For that reason, you should never judge a tube solely based on the FOM number alone.
You’re going to get an entire spec sheet, so you should use the entire spec sheet.
SNR
Signal-to-Noise Ratio is one of the key metrics that factor into FOM. This metric measures how much of the image you see is accurate and how much of it is just visual noise. A higher number is better here; the higher the signal-to-noise ratio, the clearer and less noisy the image will be.
Low image noise will make it easier to pick out details in the image, which is a very important quality when scanning for threats or targets. For that reason, pay particular attention to the SNR number whenever you shop for tactical night vision.
TUBE RESOLUTION
You might see this listed as LP/MM, but essentially, it’s a measure of the image resolution. It’s worth knowing that this metric is measured at the center of the tube, so your resolution may depreciate around the edges of the image. The quality of the glass in your lenses will also play a part in the image’s visible resolution.
Obviously, a higher resolution is better, but there is a point of diminishing returns. The current military specifications for image intensifier tubes require an LP/MM of 64 or greater. Your individual requirements may vary, but it’s safe to set that as a baseline.
EBI
EBI stands for Equivalent Background Illumination. This is a measure of the baseline amount of light emitted by the tube. To form a usable image, the light entering the tube must exceed the EBI.
Picture a candle on a sunny day. There’s a flame there, but you won’t really be able to see it because the sunlight is brighter than the flame. Brought into a dark room, however, that candle would be plainly visible.
EBI works in a similar way: the lower your EBI, the less light you need to create a usable image. EBI is most noticeable in near total darkness, like under a forest canopy or cloudy, moonless sky, but it can also play an important role in urban environments. Inside buildings, you’ll often never know the light level of the next room until you’re exposed to it. Having a low EBI makes it much easier to distinguish shapes (and possible threats) when glancing into a dark, unilluminated room.
It’s important to note that EBI also fluctuates with temperature; lower temperatures will reduce your EBI, while higher temps will increase it—sometimes substantially. For this reason, EBI is much more important to some users than others.
If you live in an open tundra, your EBI probably doesn’t matter much. The cold weather would boost your EBI, and with starlight bouncing off the ice and snow, you’ll rarely be in total darkness, anyway. On the other hand, if you live in a hot climate (like Texas), then the high temperatures can make EBI much more important.
The U.S. Military usually requires tubes have an EBI of 2.5 or below, and we recommend following that guideline. Of course, the challenge is deciding on how much EBI matters compared to SNR and resolution. Should you purchase a tube with slightly lower SNR if it means having a super low 0.1 or 0.2 EBI? That answer depends on your individual needs.
Just remember. You can mostly overcome poor EBI with an illuminator or high luminous gain, but you can’t overcome poor baseline performance from low SNR.
HALO
This one is self-explanatory. Halo is a measure of the amount of glow perceived around a light source. As with EBI, a lower number is better.
Users in urban or suburban areas will need to pay more attention to this number than, say, backwoods hunters. Your halo number only really matters if there are lights around to cast a halo, so users in very remote locations shouldn’t worry too much about this one.
LUMINOUS GAIN
You may see this listed as gain.
This is a measure of how many times light is multiplied before it reaches your eyes. A higher luminous gain ultimately results in a brighter picture being delivered by your NODs.
Higher gain and a brighter picture are typically better. That said, if luminous gain climbs too high, it’ll create noise, reducing the signal-to-noise ratio.
SPOTS AND BLEMISHES
Specs and blemishes might not be fully covered by every spec sheet, but they’re an important consideration to tube quality.
Spots or blemishes refer to small, dark spots in the intensifier tube. Usually, these are caused by abnormalities in the manufacturing process or by damage from bright light exposure or shock after the tube has been assembled.
Spots are categorized into three zones. Zone 1 is a circle at the center of the tube image—the worst place for a blem to occur. Zone 2 is a ring around this circle, and Zone 3 is the exterior edge of your tube’s field of view.
Small spots in Zone 2 or Zone 3 are not uncommon, especially in budget-friendly NVGs. In most cases, they don’t affect function in any significant way. The extent of blemish you can tolerate is largely a personal decision, heavily influenced by your budget.
Very small spots, sometimes called peppering, are not commonly listed on spec sheets and may not be visible in all scenarios.
CONFIGURING YOUR NIGHT VISION
Buying night vision is as stressful as it is fun. It’s a complex topic, full of cutting-edge technology and unfamiliar jargon. Hopefully, after reading this article, you feel more prepared to make an informed decision about what equipment is best for you. Now, it’s time to look at the supporting gear you’ll need to make the most of your NODs.
Ultimately, your night vision device is only one part of the larger equation. You’ll still need a mounting system, an aiming system, and a way to prevent your firearm from blinding you every time you pull the trigger. If you want to be truly effective in the dark, you’ll also need to fine-tune your gear to address all the little challenges nighttime operations introduce. For each of these problems, there is a solution. We’ll go through the basics of what you need to know for each piece of equipment below.
Now that you’ve got your actual NODs, your next challenge is finding a way to mount them. Depending on your night vision housing, your options will vary. The PVS-14 has the most robust aftermarket for mounts and adapters, but both the RNVG and the DTNVS have multiple mounting options as well.
Your first question is what you’ll be wearing to support your night vision: a skullcrusher or a helmet?
SKULLCRUSHERS
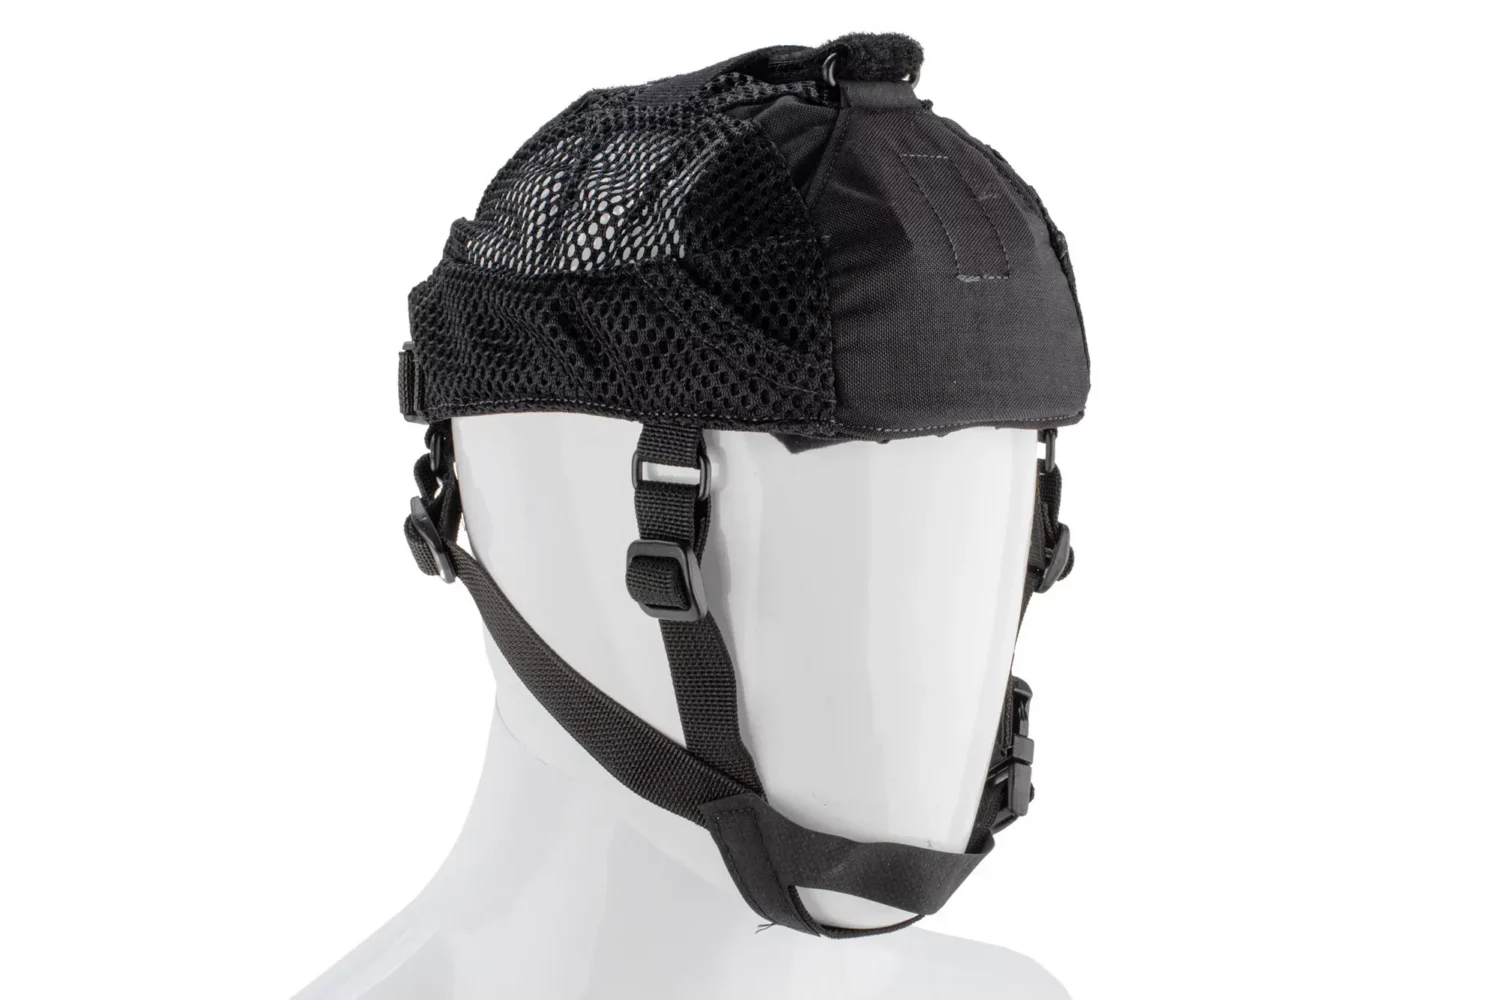
The simplest and cheapest method of head-mounting night vision is a skullcrusher.
This simple harness is cost-effective, but as the name would suggest, it’s not always very comfortable. You’re going to have at least a pound hanging off the front of your head; transferring all that weight onto a few nylon straps is a recipe for neck strain if you plan on wearing your rig for more than a few minutes at a time.
If you’re dead set on using a skullcrusher, we recommend checking out the Crye Precision NightCap. Crye is renowned for creating intuitive, comfortable gear for tier-one teams, and the NightCap is no exception. Of the non-helmet options, the NightCap is easily one of the best.
HELMETS
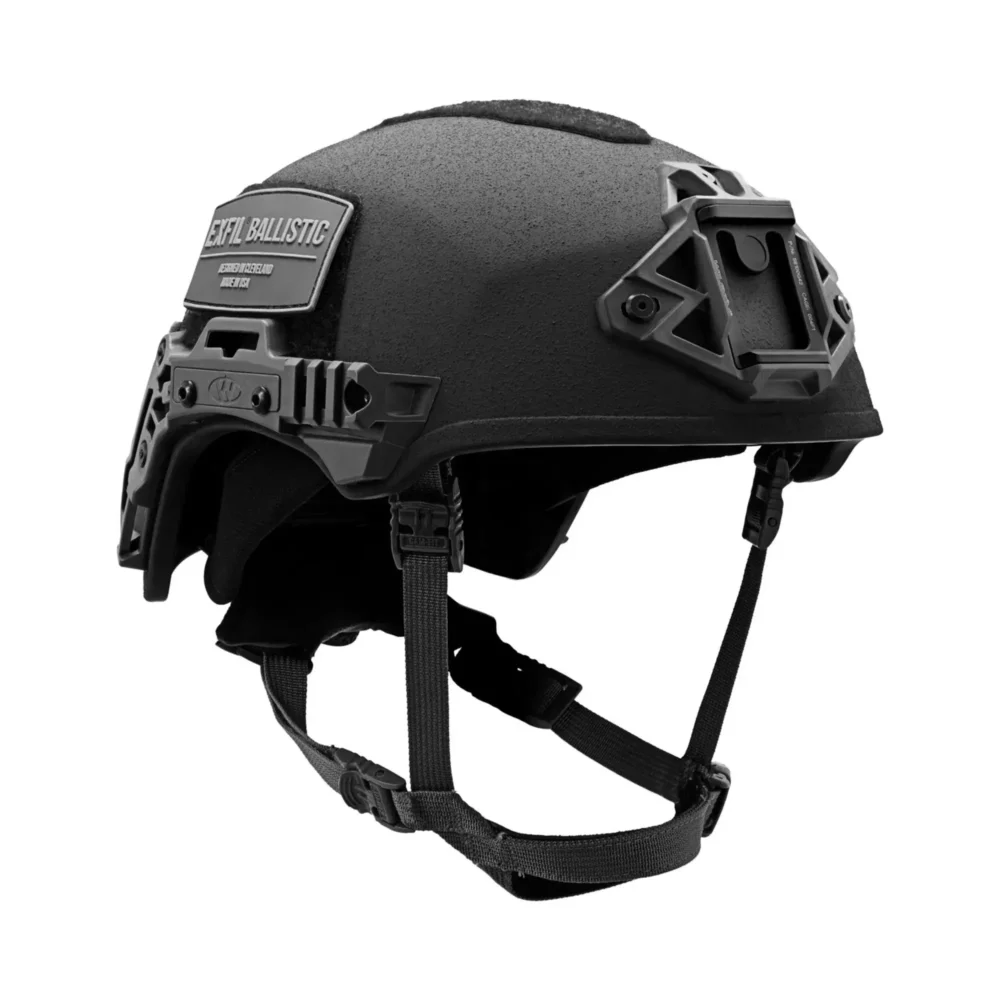
Most night vision owners will eventually spring for a ballistic or bump helmet for their mounting platform.
The two are perfectly equal as far as night vision is concerned, but ballistic helmets offer the added benefit of low-level armor plating. They are more expensive than bump helmets though, which only protect against physical impact. If you’re not planning around return fire, you can save a few dollars by forgoing the ballistic armor.
There are plenty of good ballistic and bump helmets on the market. We’re partial to Team Wendy helmets, but any quality manufacturer will do.
When choosing a helmet, the first thing you’ll want to decide on is the cut. High-cut and extra-high-cut helmets are lighter but offer less protection than a traditional helmet cut. The benefit of these designs, though, is the weight and compatibility with a wider range of comms equipment. Ultimately, it’s up to you how much protection you require; any cut will function fine as a base for night vision.
Next, you’ll want to look at what features you require in your helmet. More expensive models may have better padding or more advanced materials, allowing for greater protection and reduced weight. You can always spring for upgraded pads or retention systems later, but it’s usually cheaper to just get it packaged with your helmet from the start.
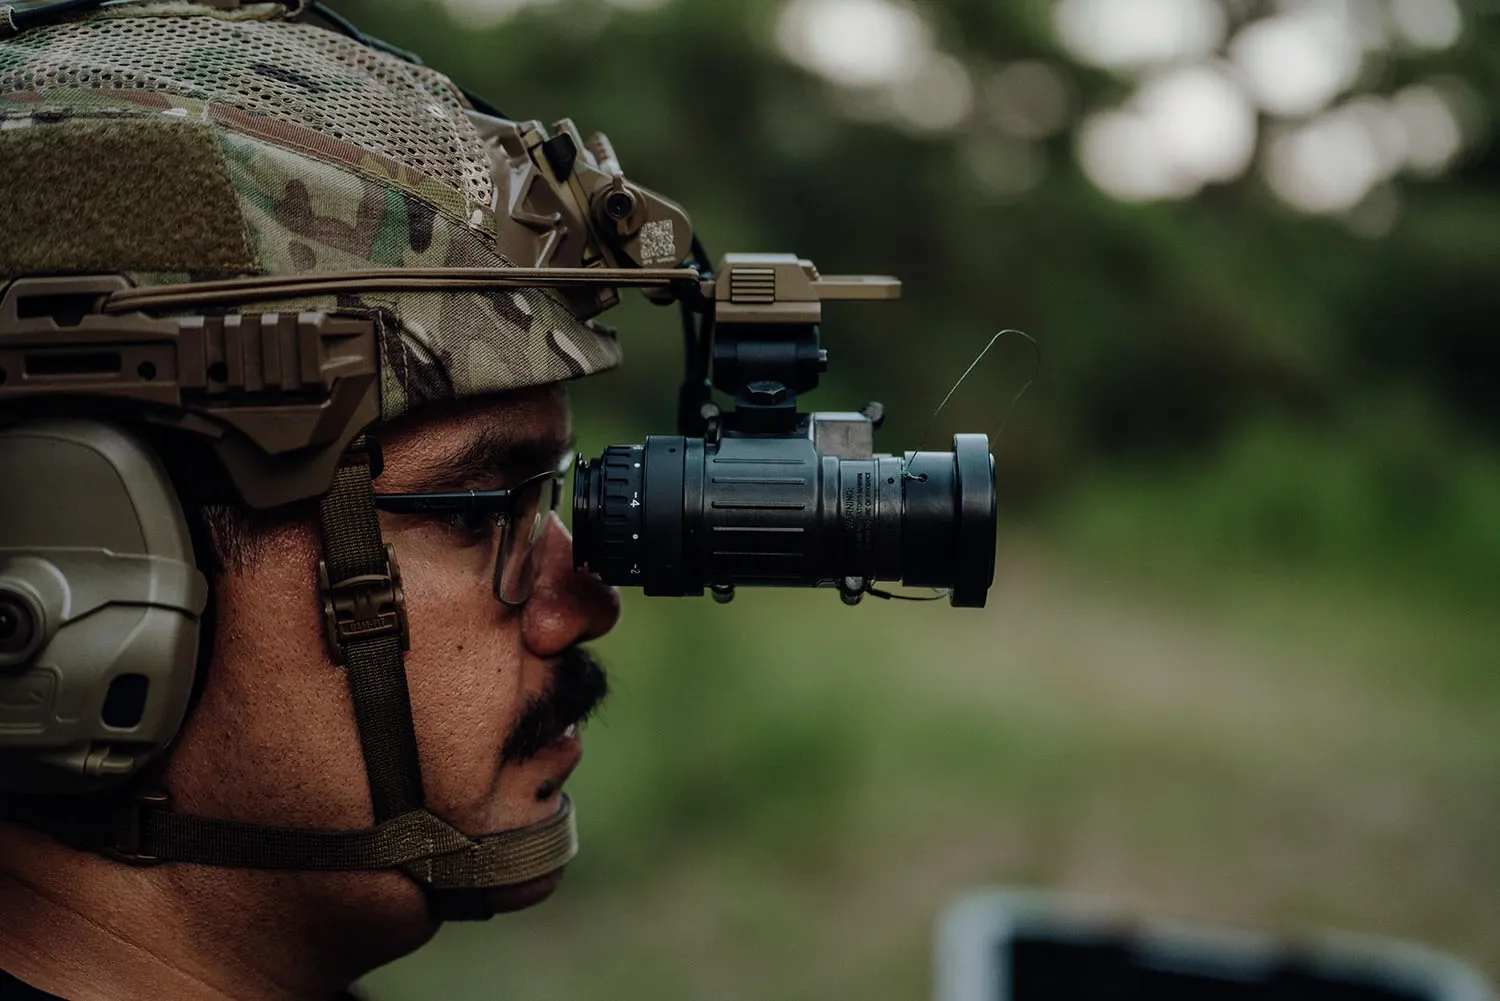
For night vision, the key feature you’ll need to consider is the helmet’s mounting interfaces. The biggest one is the shroud: the primary connection point between your helmet and your night vision mount. Some helmets will come with a particular shroud installed, while others are pre-drilled for an aftermarket shroud.
It’s important to make sure that your shroud, mount, and night vision device are compatible. Not all shrouds work with all mounts, and not all mounts are compatible with all devices.
Besides the shroud, you’ll want to look at other mounting points, such as the side rails and Velcro sections. These are less critical than the shroud, but if you plan to run accessories like a helmet-mounted flashlight, you’ll need the rail space to support it.
MOUNTS
After selecting your helmet and shroud, you’ll need a mount to interface between the helmet shroud and your night vision device.
In selecting a mount, the biggest things to look for are durability and adjustment range. You don’t want your mount to be the weak point of your night vision setup, so it’s important to buy from a proven brand like Wilcox or Norotos.
While your device has adjustments for focus and interpupillary distance, your mount controls the general position of the device. This includes how high or low the optic sits in relation to your face and far from your eye it is.
One of the more popular mounts on the market is the Wilcox G24. It integrates a breakaway feature that allows the night vision unit to separate from your helmet under severe stress. This limits the snagging risk to the device and the user simultaneously. The G24 is also highly adjustable and interfaces directly with the dovetail mount found on RNVG and DTNVS goggles.
Originally designed around the older MIL SPEC bayonet mounts, the PVS-14 is a highly versatile device that can interface with most systems. You’ll just need the right J-Arm.
To use a PVS-14 with a Wilcox G24, you’ll need a Wilcox J-Arm. Wilcox makes a PVS-14 adapter arm available with or without an automatic on/off feature, or you can use one of the various aftermarket adapters.
Alternatively, the Norotos RHNO II mount is still very popular with PVS-14 users. It was designed for use with bayonet-style mounts, so most MIL SPEC J-arms will allow it to connect to your night vision just fine. The RHNO is also a fair bit less expensive than the Wilcox mount, so it’s a good option for users looking to save a few dollars. Just don’t expect the same level of adjustability.
In your research, you might also come across NODs that use a “Ball Detent” mount. Most of these are ANVIS-pattern NODs, designed specifically for aviation. ANVIS setups have mostly fallen out of favor for ground teams since they weren’t designed for field durability, but if you’re buying for aviation or stargazing, ANVIS systems might be the perfect choice.
NIGHT VISION COUNTERWEIGHTS
Until you’ve used night vision, you can’t predict how much strain it puts on your neck. The additional weight takes its toll, but for many, it’s the lack of balance that really hurts.
Having an additional 1-2 pounds added to the front of your head creates an imbalance that is constantly pulling your head forward, forcing the muscles in your neck and upper shoulders to activate.
Adding a counterweight to the back of your helmet increases the total weight, but also balances the system so that the weight is pressing straight down on your head rather than pulling it forward, which can feel less stressful on your body.
Counterweights come in several forms. The cheapest versions are simple pouches that attach to the back of your helmet and contain a lead weight roughly equivalent to your NODs. More sophisticated versions can double as admin pouches to store spare batteries, tools, and more.
For the most elegant solution, you can use a remote battery pack to balance your NODs. These devices plug directly into your night vision using a cable, providing a much longer runtime. Not every night vision device is compatible with battery packs, though. To use an off-board battery pack, your NODs need a LEMO Port.
Many of the newer RNVG housings have a LEMO Port, but you’ll want to verify using the item description.
Lights, Lasers & Optics
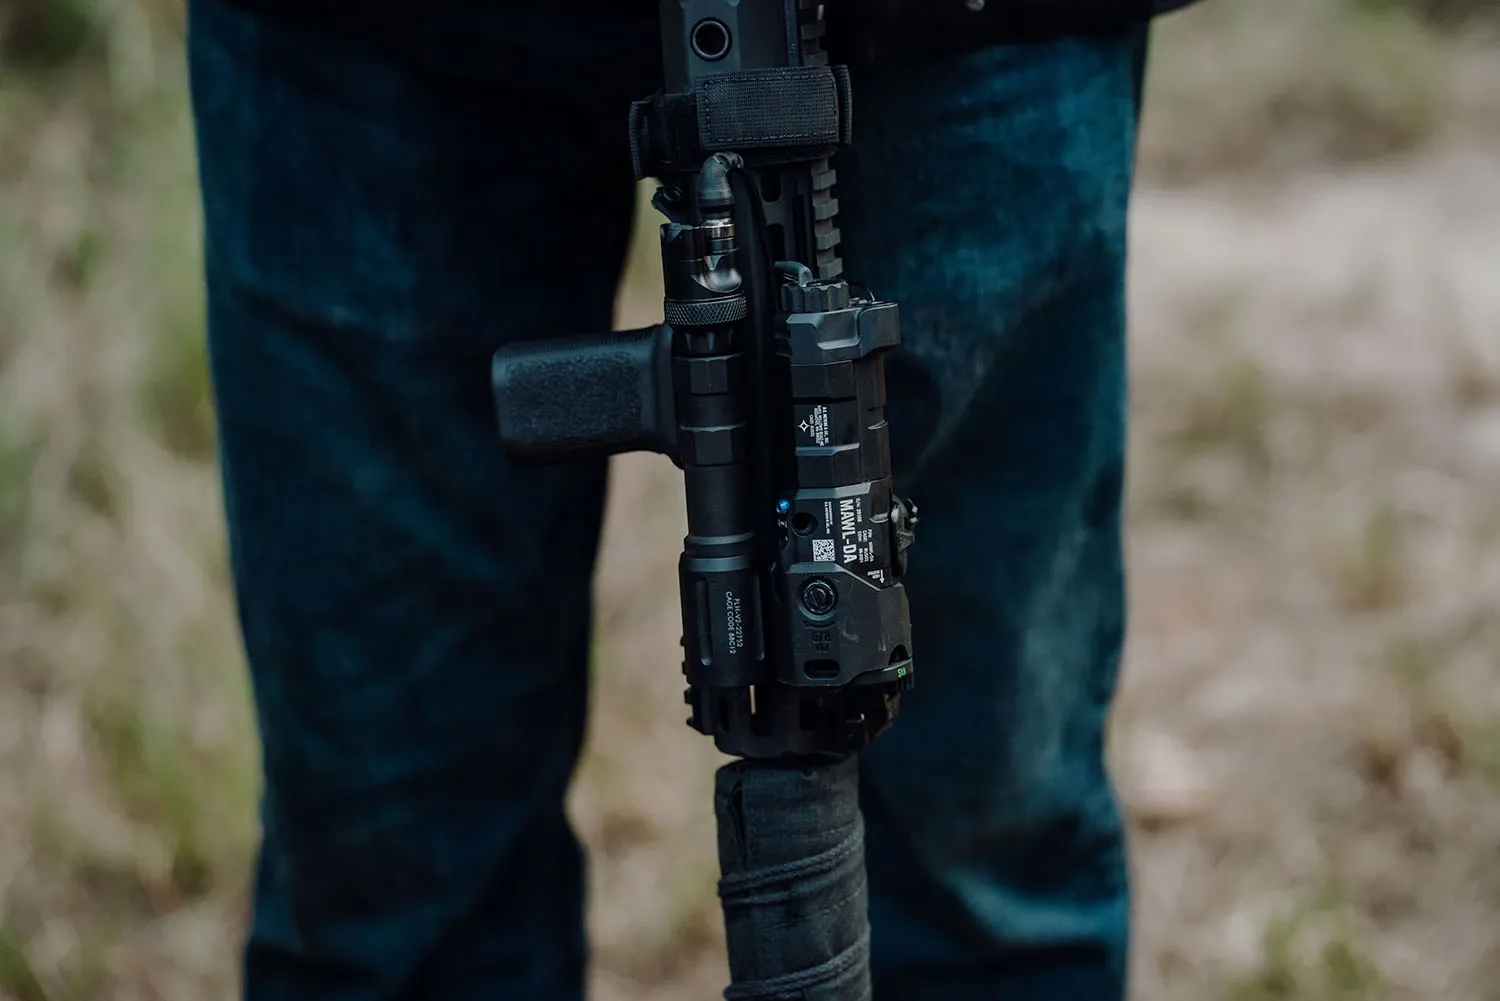
Remember how we mentioned the difficulty of aiming while wearing helmet-mounted NODs? Well, there are some great products to help you overcome that challenge to achieve split-second engagement speed.
“IR device” is a broad term that covers both infrared illuminators and aiming lasers, as well as combination units that house both. Technically, these devices are classified as “Near-Infrared,” since they fall just outside the spectrum of actual infrared light, but the distinction has little relevance to our applications so you’ll most commonly hear them referred to as IR or infrared.
Infrared illuminators act similarly to flashlights by providing general illumination to an area. Some are more focused, throwing a narrow beam, while others flood a wide area with IR light. In either case, the goal is to provide more infrared light so your NODs can produce a better image.
An infrared illuminator can light up an area that’s too dark to see into, even with your night vision. Every time you activate a device that emits infrared light, though, you advertise your position to anyone else running night vision as well. Some illuminators also emit a subtle red glow, which is visible to the naked eye at short distances. As with white light, careful discipline is required in an environment with armed opposition.
The other purpose of an infrared illuminator is to defeat any photonic barriers you may encounter. A photonic barrier is essentially any light source between you and your target that produces enough light to obscure what is beyond it.
Say you’re out camping with your night vision. You can look all around the woods in the dark and see just fine, thanks to your NODs. When you look at the campfire, though, all you see is a bloom of light. Anything could be hiding on the other side—you have no visual.
With sufficient IR illumination, though, you can overwhelm the light of the campfire and illuminate whatever may be beyond it as well.
IR lasers fill a different role. Like a visible laser, they offer an aiming solution—one that doesn’t require you to get your NVGs lined up with your optic. Simply activate the laser, point it on the target, and pull the trigger. It’s fast, intuitive, and easy, even on the move.
As with IR illuminators, you’ll want enough power in your laser to push past photonic barriers when possible. Unfortunately, civilian users are limited to devices with a power of 0.7mW or less for IR lasers and 4mW or less for illuminators, so that may not always be possible. For comparison, the mil-spec AN/PEQ-15 boasts a maximum laser output of 25mW and a max illuminator output of 30mW. The LA5 variant can put out a beam with over 80mW—a big step up from the 4mW limit for civilians.
That said, IR lasers are still an active aiming solution: they require you to emit light to use them. As with illuminators, every time you activate an IR laser, you risk advertising your position. For that reason, an IR laser is not the end-all-be-all of night vision aiming, but you’ll still want one on your rifle.
While dedicated aiming lasers or illuminators are available, most of the popular devices on the market today are combination units. We’ll go over the most popular units below.
HOLOSUN LS321G
Holosun is pretty well-known for making feature-rich and affordable red dot sights, but few people are aware that their product line extends to IR units as well.
The LS312G is one of the more affordable IR units on our list, but still features co-axially mounted visible green and infrared lasers, an IR illuminator, and remote activation switch compatibility. The illuminator itself is adjustable for focus, allowing users some control over the amount of flood and throw produced.
The unit’s housing is made from 7075 T6 aluminum and ruggedized for vibration resistance. It’s IP67-rated for dust and water resistance, meaning it will withstand water in reasonable amounts for short durations. This is fine for most users, but if your use case includes any kind of maritime operations, you’d probably be better served with a more water-resistant unit.
The LS321G is a great unit for cost-conscious users who still want a full-featured device.
DBAL-A3
The Dual-Beam Aiming Laser Advanced-3 is Steiner’s version of an all-in-one aiming system. Like the ATPIAL-C, it combines an IR illuminator with a visible and IR laser. Unlike the ATPIAL-C, it also adds high and low-power modes, giving users more options to dictate just how much light they produce, at the cost of a more complex control scheme.
The DBAL-A3 features slaved aiming lasers, meaning that zeroing your visible laser also zeroes your IR laser. This allows users the convenience of being able to zero during daylight hours and have both lasers on point and ready to go.
Dual remote switch ports allow users to run separate tape switches for the visible laser and IR laser/illuminator. This is especially useful for users that switch between night vision and normal daylight optics frequently, as it allows for rapid switching between IR and visible light without having to fiddle with the rotary switch.
MAWL-C1+
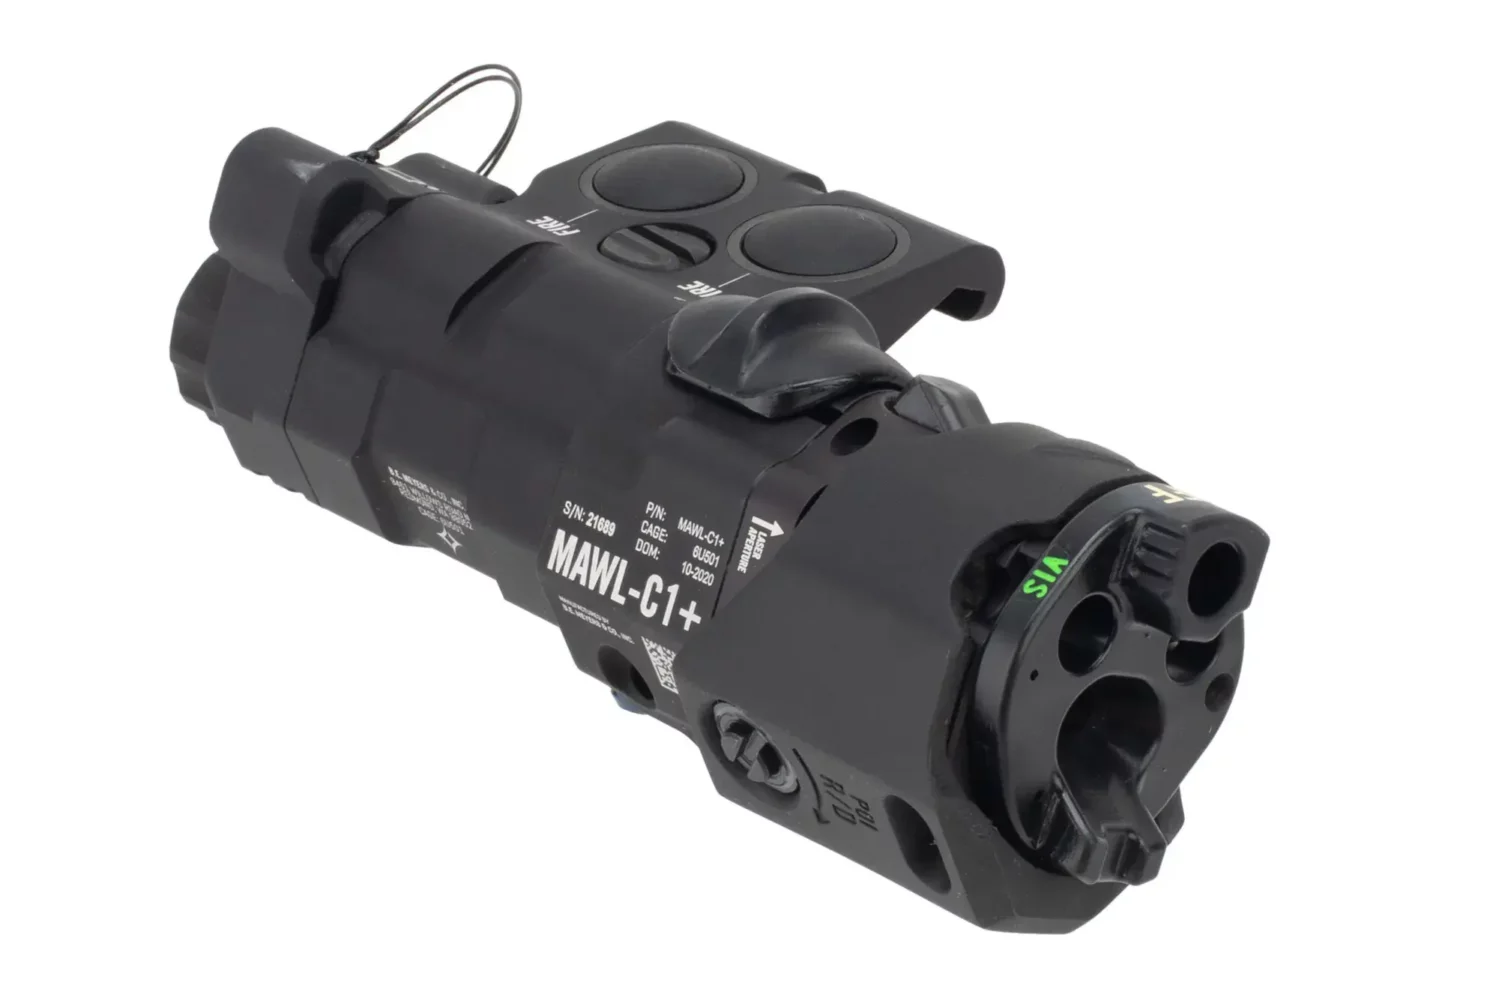
The newest IR unit on the block, the Modular Aiming Weapon Laser is a radical departure from the more traditional configuration of the ATPIAL-C and the DBAL-A3. While it is remote switch compatible, the ergonomic and intuitive controls make it easy to rely on the onboard switches.
Most IR units sit directly on top of a Picatinny rail. The MAWL uses an offset configuration, with only the clamp and activation buttons sitting over the rail. This makes the onboard controls much more comfortable to use. It also reduces its visual profile.
The MAWL offers 3 different modes, each with 2 sub-modes, but the multiple button setup makes it easy to switch between them—even when working in the dark. A sliding switch is used to select from Close-, Mid-, and Long-Range modes, then the two push buttons activate the desired sub-mode.
Beyond its intuitive design, the MAWL achieves significantly lower beam divergence than its competitors. This makes it appear brighter and more powerful, despite being subject to the same output limitations as other civilian lasers.
All these features don’t come free, though; the MAWL-C1+ is the most expensive unit on our list, but if you’re looking for the best, it’s hard to overlook BE Meyers.
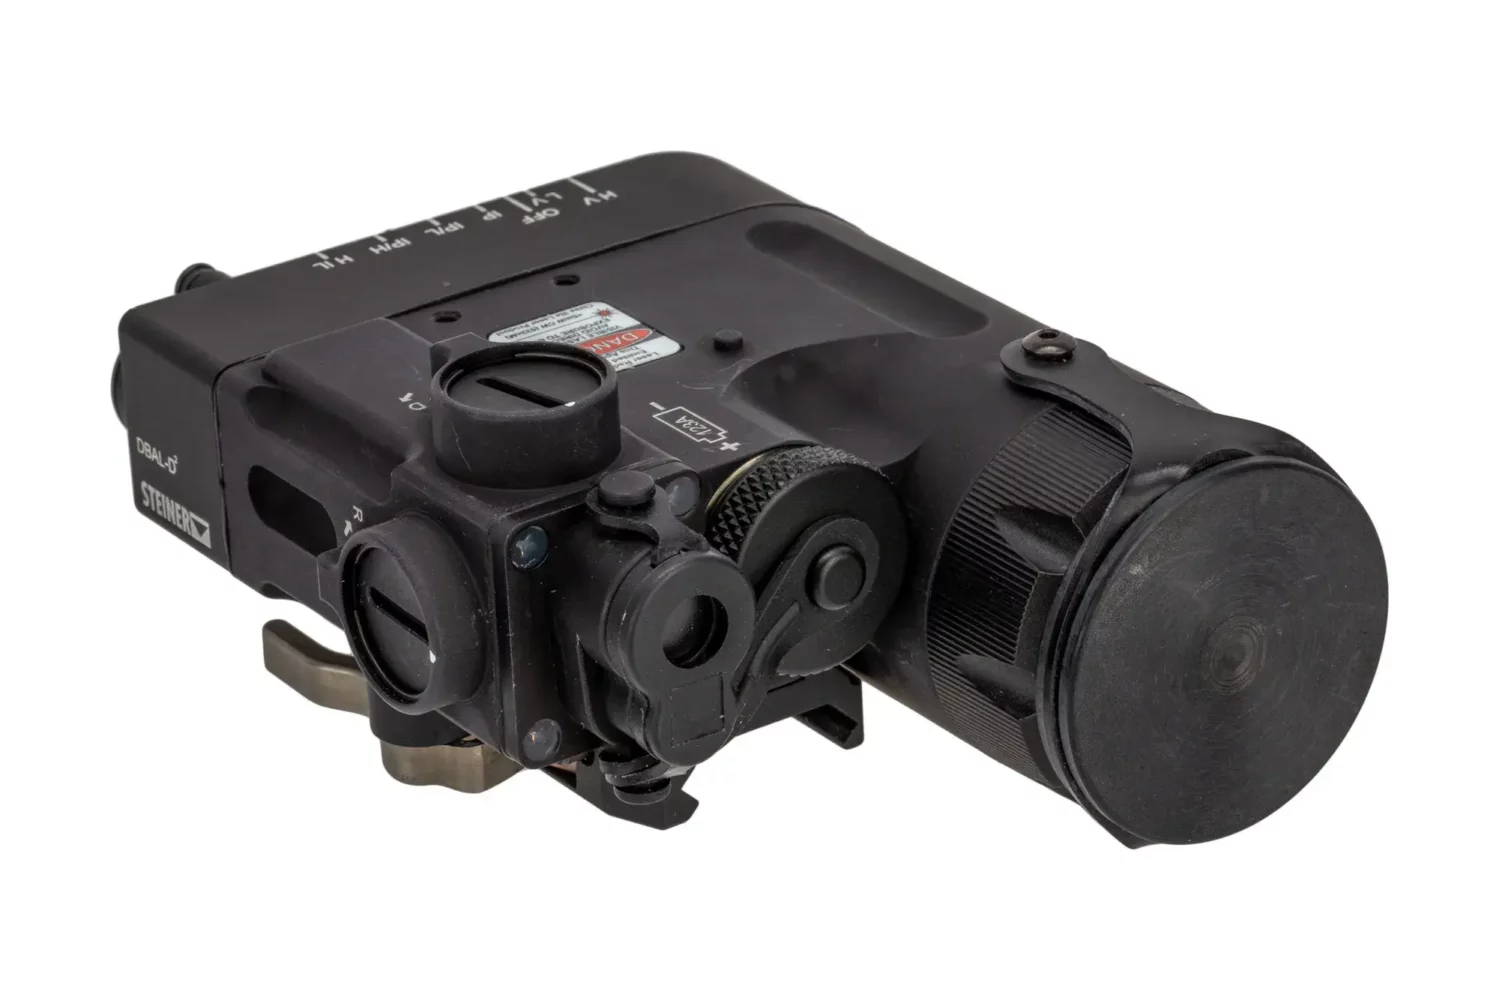
DBAL-D2
The DBAL-D2 is essentially a modified version of the DBAL-A3. Both units share the same slaved lasers with identical power levels. However, they differ in their illuminator design.
All three of the above IR units use laser illuminators. Normally, when we think of a laser, we think of the thin, precise beam of light produced by the aiming lasers, but the wider beam used for illumination in the ATPIAL-C, DBAL-A3, and MAWL-C1+ is technically a laser too.
The DBAL-D2 is different. Instead of a laser, its illuminator uses an LED to generate IR light, which exempts it from the laser power restrictions that regulate the other devices.
This allows the DBAL-D2 to be sold directly to civilian consumers with a massively powerful 600mW IR illuminator. It’s adjustable for focus, so you can control how much flood or throw the beam has as well.
The downside to all that power is that the DBAL-D2 is big—huge, even. It’s larger and heavier than any other unit on our list, so compact setups like SBRs or subguns may find it unsuitable. If you do pick one up, make sure you keep up with your bicep workouts.
COMBINATION IR/WHITE LIGHTS
If you envy the power of the DBAL-D2 prefer a different IR unit, there is an alternative option.
Most NVG users maintain a white light on their rifles as part of a well-rounded setup. If you want more illumination than your IR device can provide, consider a hybrid white/IR light like the Surefire Vampire series.
With 120mW of IR output, the M600V offers substantially more IR light than most devices. Unfortunately, the cost of this is white light output, as the M600V is capped at 350 lumens of output.
Ultimately, the balance between IR and white light capability will vary for each user.
NIGHT VISION IR DEVICES FOR HANDGUNS
With the rise of pistol-mounted red dots, handgun IR devices have largely fallen out of favor. With a night vision-compatible dot, there is no significant challenge to acquisition, and supplemental illumination is not usually required at normal handgun distances.
Still, there are handgun IR units available for those who want them. SureFire, Streamlight, and Steiner all offer combination units with IR and visible aiming lasers, as well as IR illumination.
One thing is for certain; whatever aiming solution you decide on for your handgun, avoid tritium sights. They may call them “night sights,” but when it comes to night vision, tritium vials create a source of light too close to your NODs to be useful. Since they’re outside your NVGs’ focus, you’re just going to see dull blobs of light that impair your visibility.
PASSIVE AIMING OPTICS
No matter how good your aiming laser is, there may be times when you need a more subtle option. Even low-powered IR illuminators risk compromising your position if the opposing force is night vision-equipped, which is why it’s important to have a passive aiming solution as part of your loadout.
Aiming lasers are “active” because they create a light signature that will expose your position. Passive aiming is the opposite side of that coin—an aiming solution that emits no light and thus cannot advertise your position.
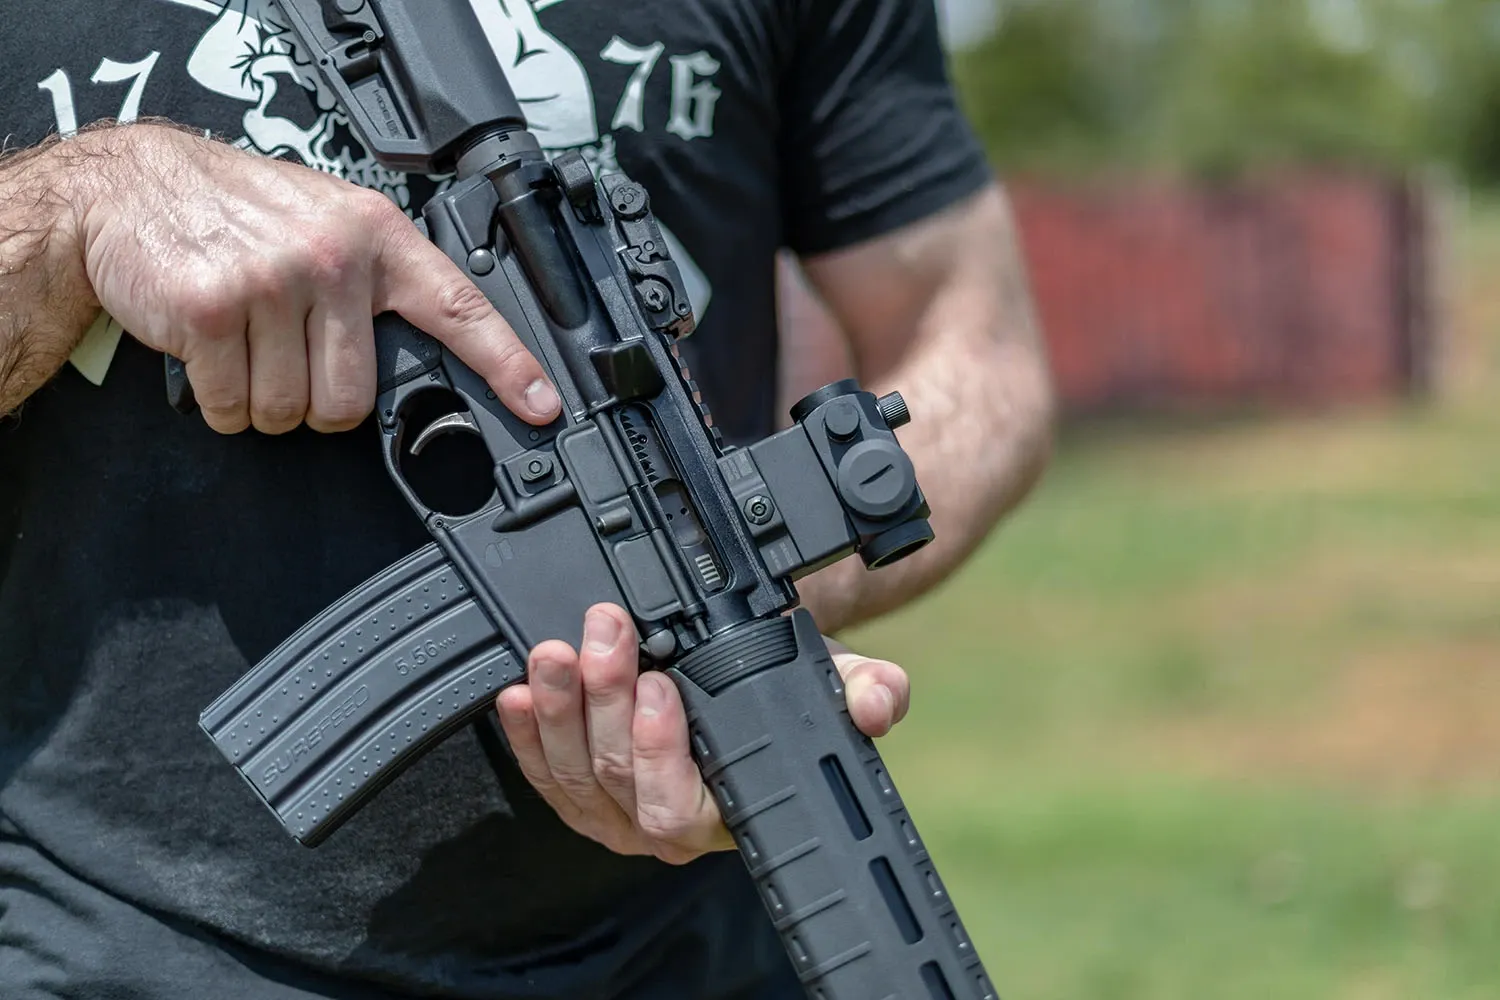
With night vision, this usually means a night vision compatible red dot. If you already have a red dot on your rifle, this can be as simple as switching to a night vision setting, or if your optic doesn’t have such a setting, turning its illumination setting down to the minimum.
To acquire your red dot quickly and effectively, you may need an optic riser or 1.93″+ mount. By mounting your optic higher over your firearm, you make it easier to get behind your optic and get a proper sight picture while wearing NVGs.
With extra-tall mounts rapidly gaining in popularity for use with and without night vision, you may already have a setup that will work fine with your NODs, with or without modification. Scoped rifles will need more than a tall mount to be usable with night vision. The limited eye relief and multiple lenses inherent to scopes make them harder to use with helmet-mounted NVGs.
Many users who field magnified optics use a piggyback mount for night vision. Piggyback mounts allow you to attach a mini reflex sight to the top of your scope. This sets the reflex at roughly the same height as an extra-tall mount—perfectly situated for use with night vision.
Ideally, you want to have both passive and active aiming solutions available to you when using night vision. Your passive solution allows you to maintain light discipline, while the active option provides additional illumination when needed and an emergency backup for unexpected situations when you don’t have time to get behind your optic.
ADJUSTING YOUR LOADOUT
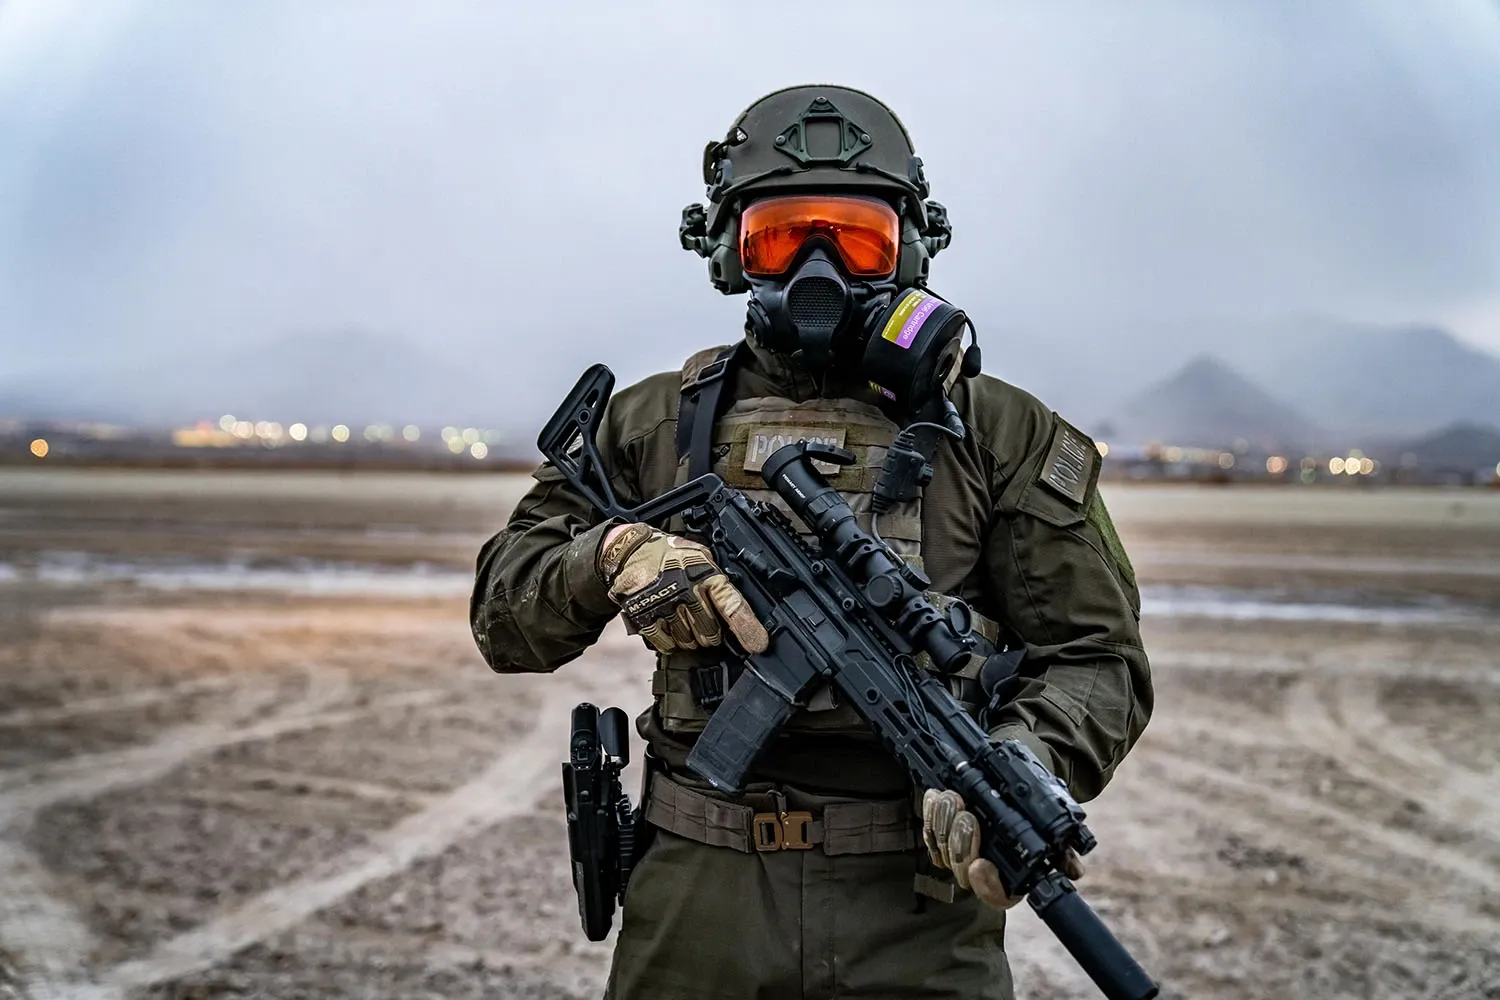
You’ve got your night vision device. You’ve got a way to wear it, a way to aim (hopefully passively and actively), and a way to illuminate what’s in front of you and push past photonic barriers.
You can now see and shoot in the dark, but that doesn’t necessarily mean you can fight. You’ve got the basics covered, but there’s plenty of ground still to cover if you want to be as effective at night as you are in the daylight.
Below, we’ll look at what considerations you need to keep in mind as you design your firearms and stage your gear, and what changes can be made to a daytime loadout to make it ready for nightfall.
ADJUSTING YOUR LOADOUT: FIREARMS
Assuming the primary purpose of your night vision setup is some sort of tactical goal, be it training, self-defense, or tactically-oriented competitions, you’ll want to set up your firearms to be effective and easy to use with your night vision.
There are a few attributes that play into this. First, you’ll want to make sure your weapon isn’t hamstringing you with blinding muzzle flashes or unwieldy size. After that, we’ll take a look at how you can optimize your rifle to be more easily operable under night vision.
FLASH HIDERS
Most shooters know about muzzle flash, but if you haven’t shot at night before, you may not realize just how bright it can get. Depending on barrel length, ammunition choice, and muzzle device selection, flash can range from mildly annoying to downright debilitating.
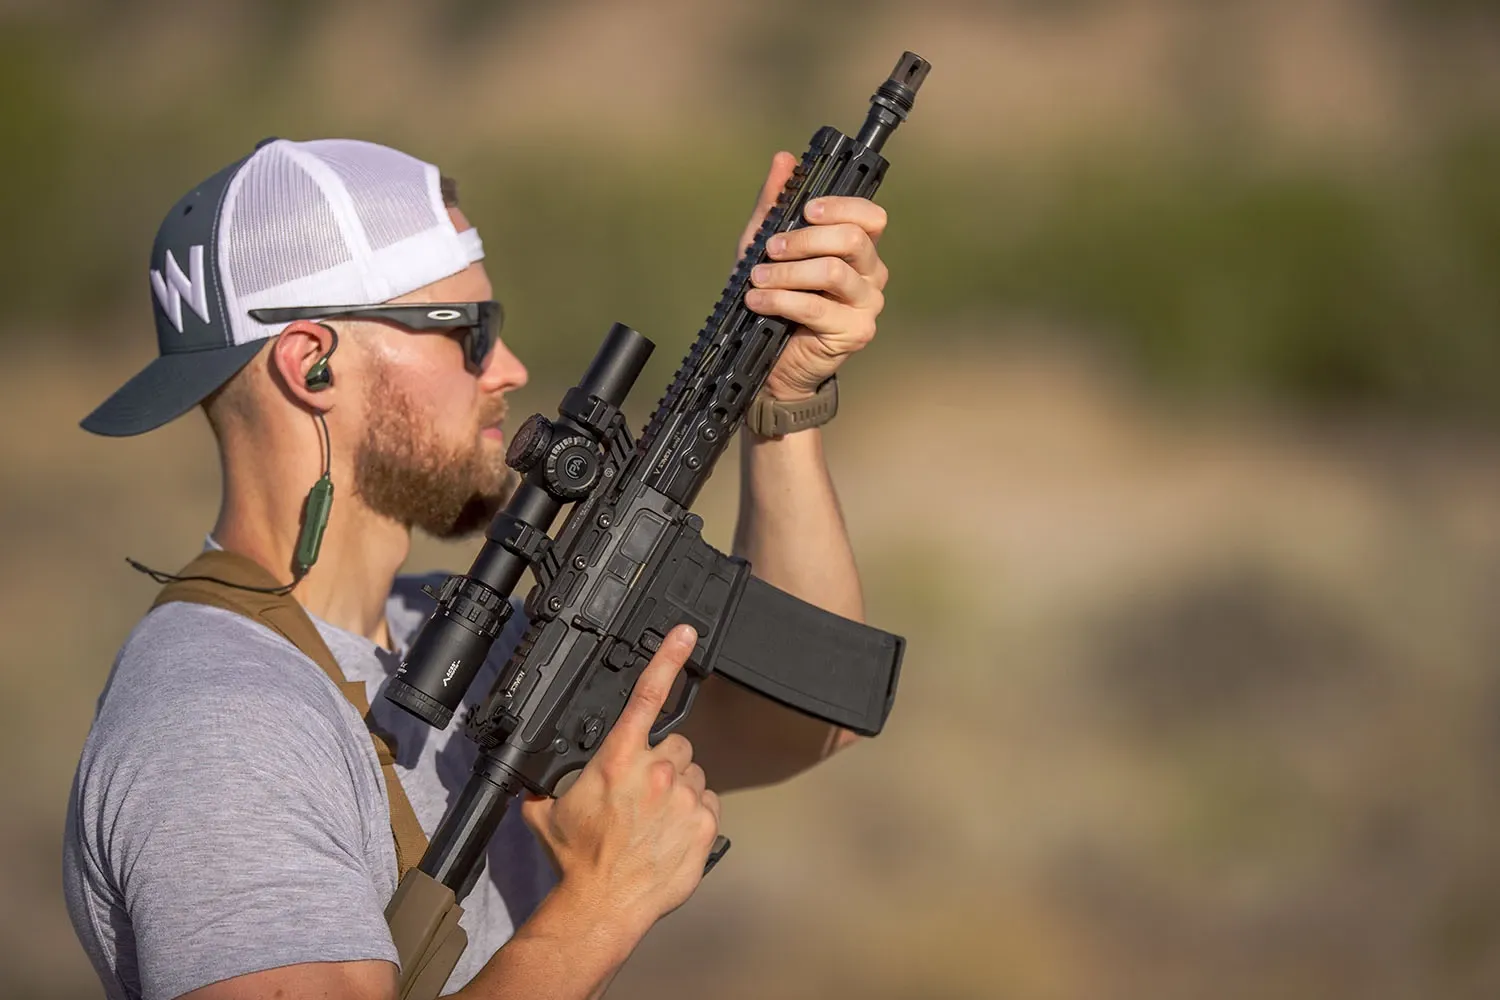
Flash suppressant powder can reduce your muzzle flash, but if you have a muzzle brake or compensator, consider replacing it with a flash hider—especially if you’re outfitting an SBR.
Flash hiders manipulate the gas expelled by a gunshot to cut the muzzle flash down to the absolute minimum. A standard A2 flash hider will do decently, but a purpose-built model like the Surefire 3 Prong Eliminator will be much more effective.
Since muzzle flash can compromise your ability to see through your NODs, you ought to at least equip your rifle with a flash hider if you plan to use it with your night vision. If your budget, use case, and local laws allow, a suppressor is an even better option.
SUPPRESSORS
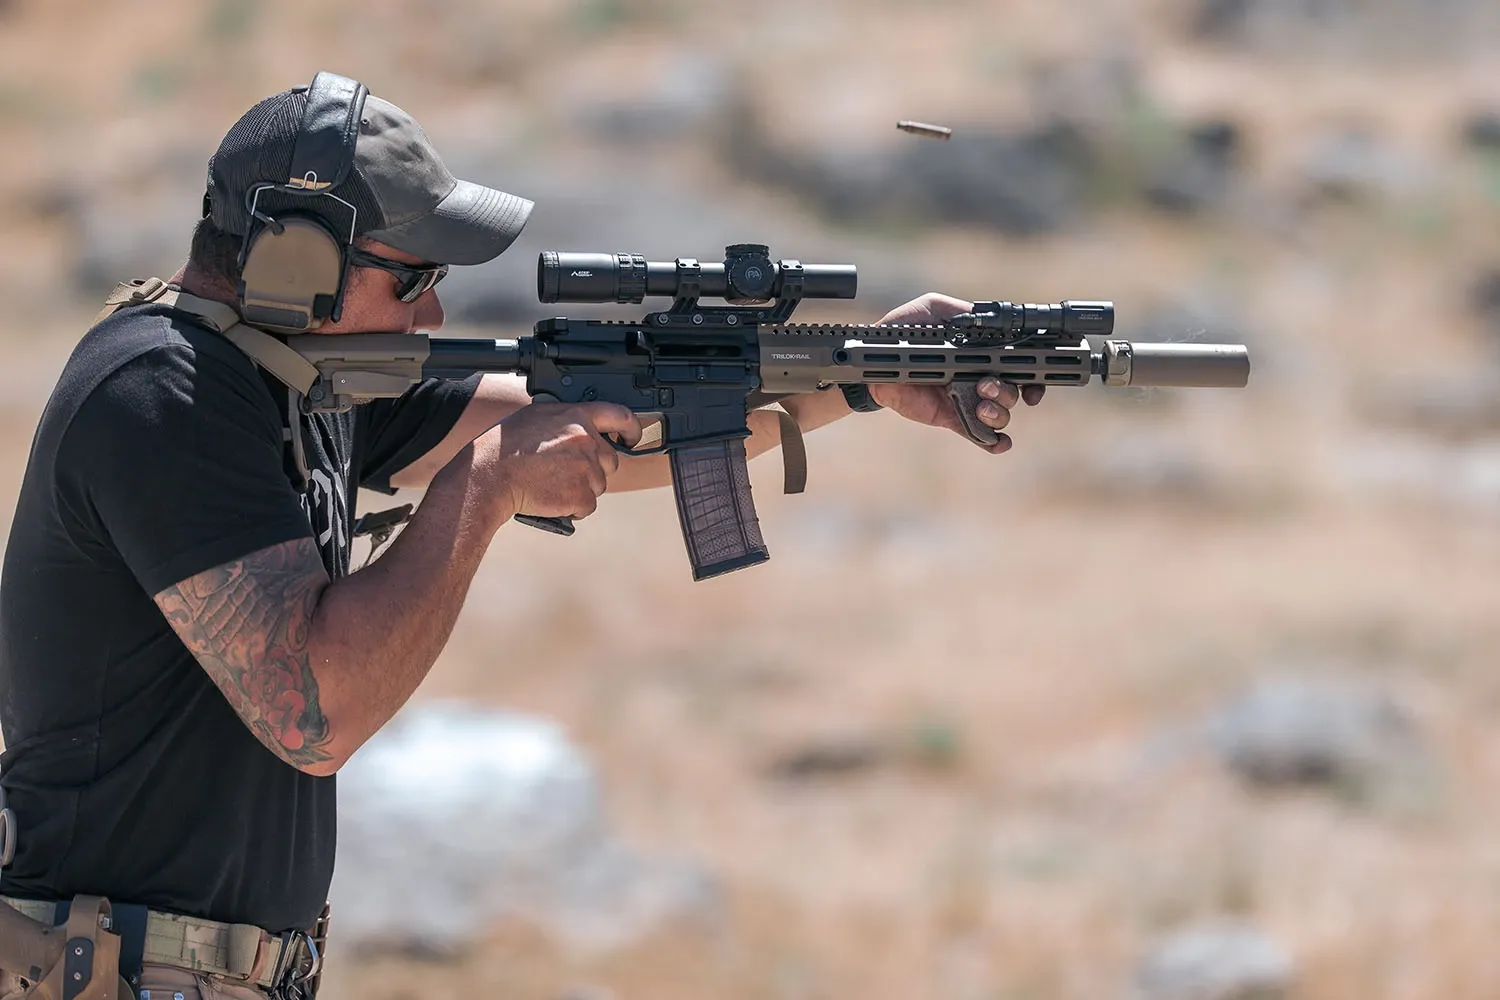
While flash hiders alter the way gas exits the barrel, suppressors simply create an enclosed space for the gas to expand and slow before exiting. Many suppressors are very effective at concealing flash for this reason. Suppressors also come with a secondary benefit: stealth. If you’re buying night vision for any sort of tactical application, stealth is largely the reason. NODs let you surveil your surroundings without advertising your location with white light, and hopefully, spot any threats before they spot you.
The same process by which suppressors eliminate muzzle flash—letting the gas cool and expand before exiting the barrel—also muffles the sound of the gunshot. By reducing your noise signature, you make it harder for threats to pinpoint your exact location, although subsonic ammunition is required for maximum effect. If your primary rifle is chambered in a cartridge like 5.56×45 or 7.62×51, you may wonder if a suppressor is worth it. These cartridges don’t have commonly available subsonic ammunition, so even with a suppressor, you’ll produce a very loud supersonic crack with every shot. This is true, but not a reason to forgo a suppressor. Because of the relative noise of the muzzle report and the supersonic crack, it’s much harder to aurally locate the source of a suppressed gunshot compared to an unsuppressed one.
Also, if you are communicating with other members of your team, suppressors will make it substantially easier to understand one another, especially in urban or enclosed settings, where unsuppressed gunfire can be deafening. If you’re already using night vision to give yourself a stealth advantage, augmenting it with a suppressor is highly recommended. Other than the added weight, there’s little downside. By using a quick-attach suppressor and a compatible muzzle device, you can have the best of both worlds with recoil mitigation when you want it and flash suppression when you need it.
One thing to stay away from: blast diffusers. While they might look like suppressors, they are functionally nothing alike. Blast diffusers take all the flame of a muzzle brake and throw it in front of you like an actual flamethrower.
BARREL LENGTH
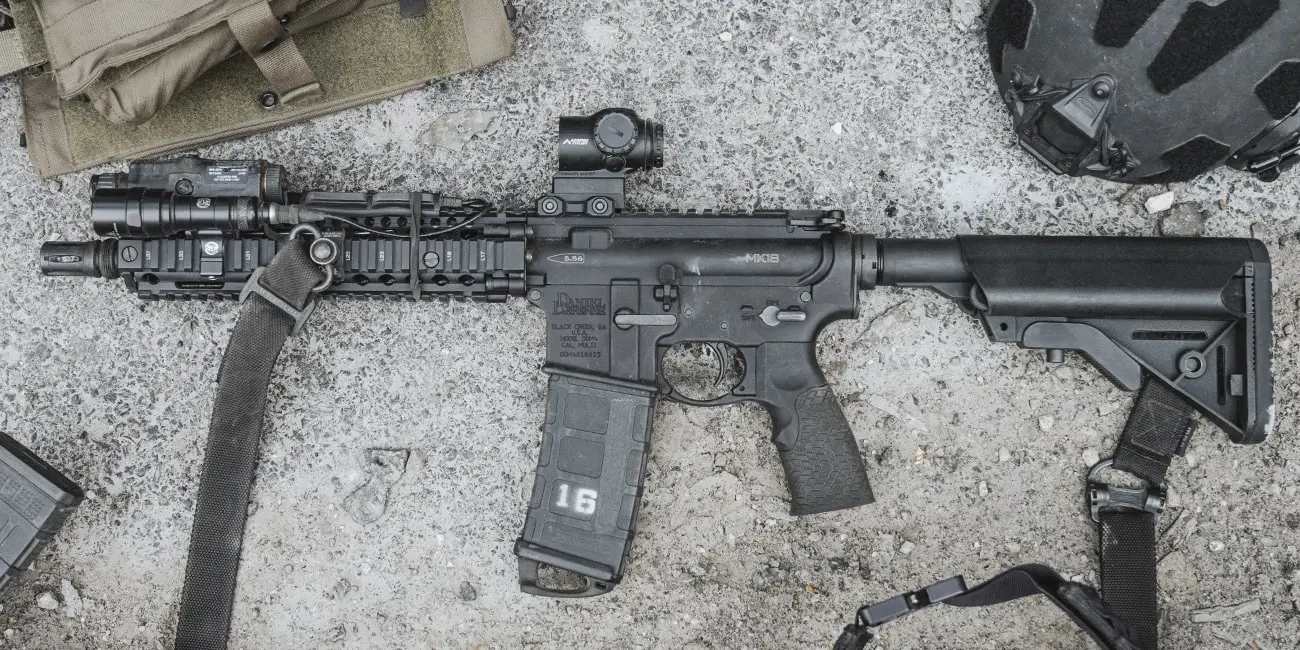
Optimal barrel length will vary depending on your firearm and cartridge, but in most cases, shorter is better for use with night vision. The primary reason is that if you’re using a suppressor—which you should be, if possible—a shorter barrel will give you a much more manageable overall package. Most suppressors add 4–6 inches to the end of your barrel, meaning that even with something like an MK18 with its 10.3″ barrel, your effective length after adding the suppressor would be around 14.5–16 inches.
That’s right in line with most full-size unsuppressed fighting rifles, and makes for a manageable firearm, even in tight quarters. If you’re already starting with a 16″ barrel though, your overall length ends up near or above 20″. Such lengths can become unwieldy under night vision, especially when navigating corridors.
The only significant drawback to a short barrel is the effective range. With every inch you give up, you lose a little speed, and it gets a little harder to engage targets at long distances. But how much does that matter under NODs?
Most night vision is used with IR lasers and red dots rather than magnified optics. With quality night vision, you can identify potential threats beyond 400 yards, but accurate engagement would be a challenge. Since your effective range is capped at a few hundred yards by your visibility and optics anyway, opting for a shorter barrel gives up very little usable ballistic performance, but offers substantial gains in maneuverability.
Of course, the equation changes if you are using clip-on or rifle-mounted night vision optics as opposed to head-mounted. Since these devices allow for magnified optics, your effective range is limited only by your ability and your firearm. In that case, your optimal barrel length will be determined by your cartridge and use case.
CONTROLS
One of the major downsides to night vision is the severely limited field of view. An average person has a field of view of about 114 degrees; common night vision devices offer a field of view of just 40 degrees. Combine that reduced FOV with a manual focus (which is usually set downrange), and you can understand how NODs can significantly diminish your agility and weapons handling. To be effective, you must be able to operate your firearm without looking at it, knowing its manual of arms implicitly.
If you’re practiced with your firearm, you can probably actuate your safety selector and magazine release completely blind. It’s not difficult to learn—both controls can be reached without moving your hand from the grip. Reloading blind is where the challenges begin.
Even if you’ve drilled enough to be able to reload without looking at your firearm in the daylight, the switch to night vision can throw off your depth perception and mess with your muscle memory, especially if you use a night vision monocular instead of goggles.
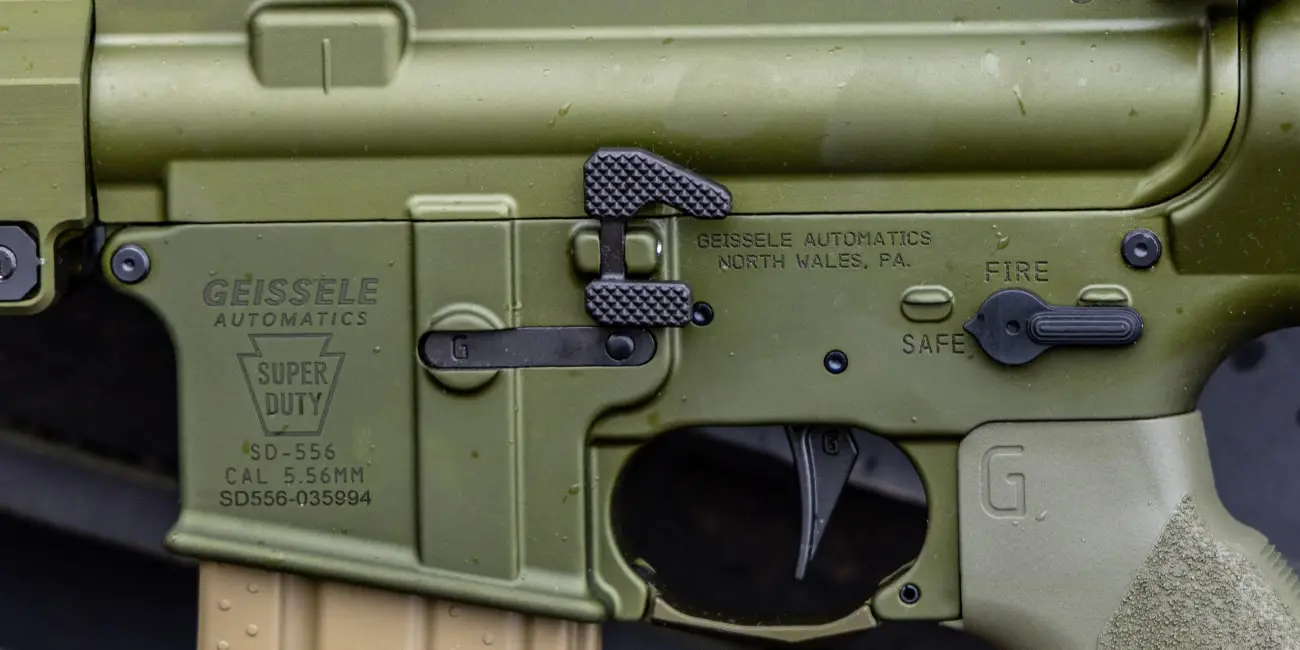
Investing in enhanced controls can help make your blind reloads faster and more reliable. For example, a larger bolt release like the Geissele Maritime Bolt Catch massively increases the acceptable margin of error, meaning less precision is required to actuate it. When you’re operating blind, the less precision required for a task, the better.
Similarly, larger charging handles like the Radian Raptor make it easier to complete reloads and clear malfunctions without having to look at your weapon.
One of our favorite upgrades, though, is a flared magwell. Depending on your firearm, you may be able to get a lower with a flared magazine well built-in, or you might be able to add an aftermarket one; in either case, an enlarged magwell will increase your success with blind reloads.
Little enhancements like finger indexes can be useful as well, helping you to quickly and repeatably place your hand in the exact same location on your firearm, but upgrading the basic controls and magwell will yield the biggest dividends in performance.
COLORATION/PAINT
One last, short recommendation: consider your rifle’s finish.
Many firearm finishes will appear extremely dark under night vision—and some metals will even glow under IR illumination. Even if you’re fully camouflaged, a pitch-black rifle can quickly give you away, even at a significant distance.
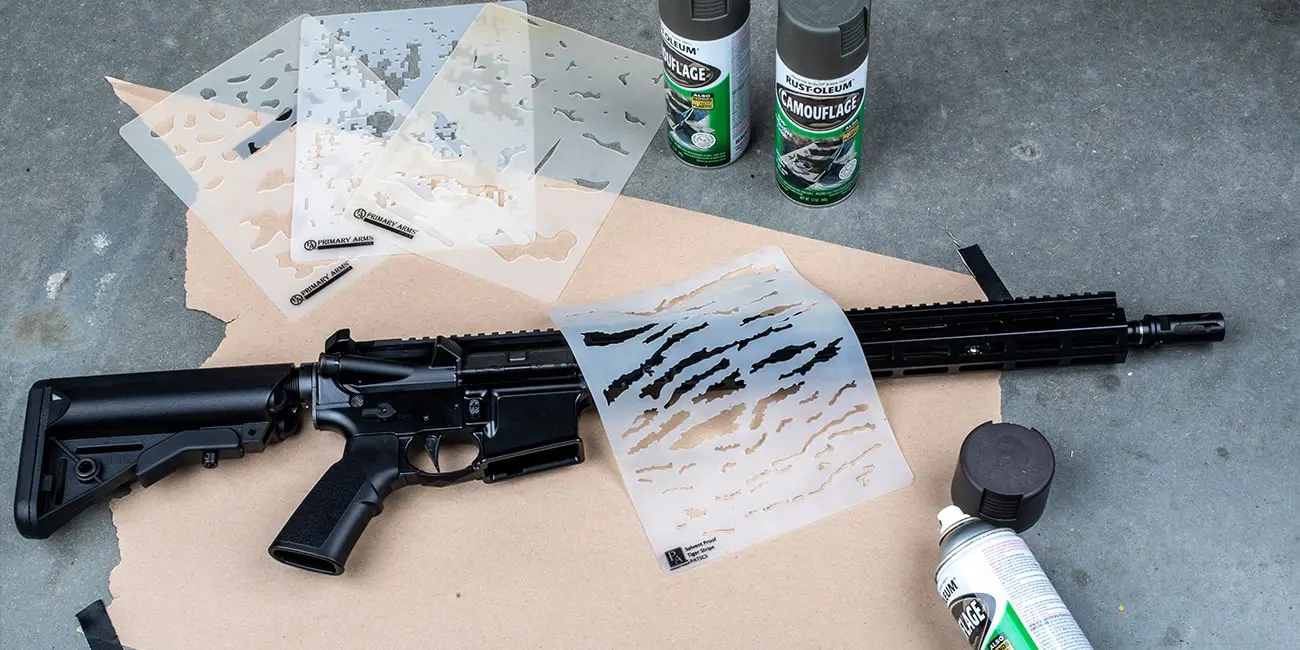
Fortunately, the solution is simple. In most cases, spray-painting your rifle with purpose-made camo paint will reduce its reflectivity substantially. These paints are available at almost every major hardware retailer, so you should have no trouble finding options.
Just make sure you get the right stuff. True camo paint is specifically mixed to eliminate reflectivity. Your average outdoor paint wasn’t designed around IR visibility. Some might still do well, but why leave it to chance? Get the right paint the first time, so you don’t have to paint over your great new pattern.
And speaking of patterns, if you’d like to add a bit of flair to your paint job, consider picking up one of our re-useable stencils. These will give you some basic patterning that you can use to further obscure your firearm’s visual profile.
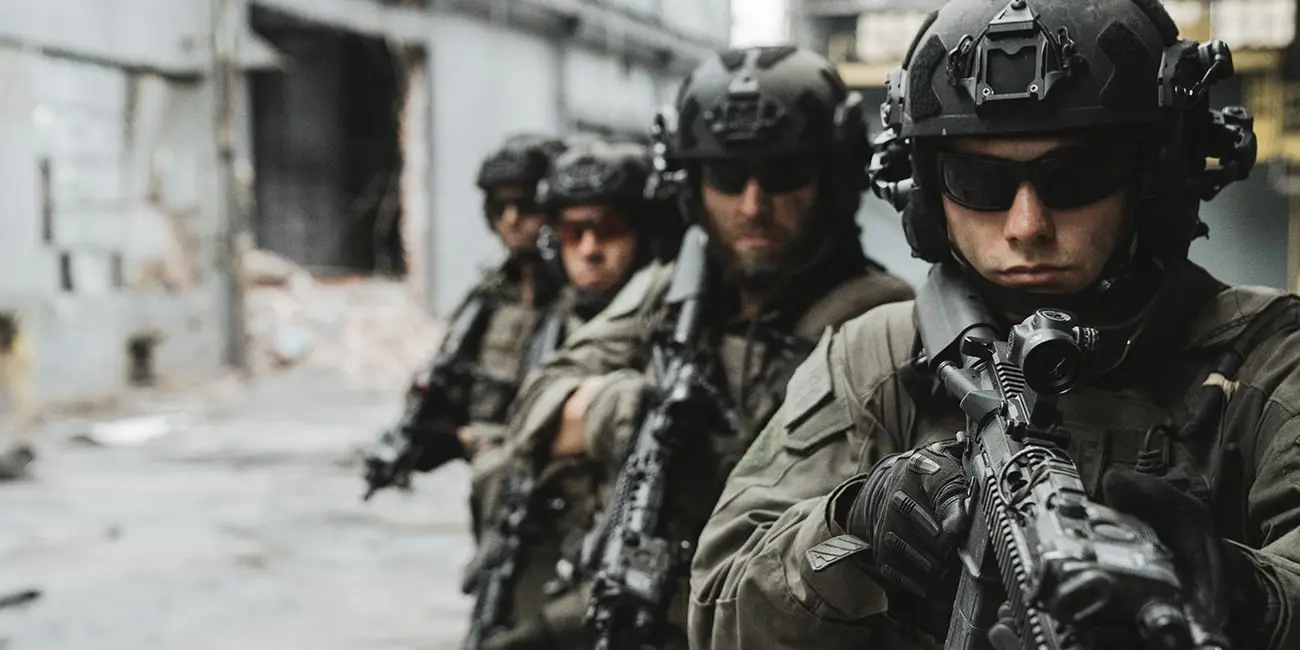
ADJUSTING YOUR LOADOUT: GEAR
The same challenges affecting your firearm will also affect the rest of your gear and equipment. For that reason, your gear needs to be staged to be accessible without looking at it.
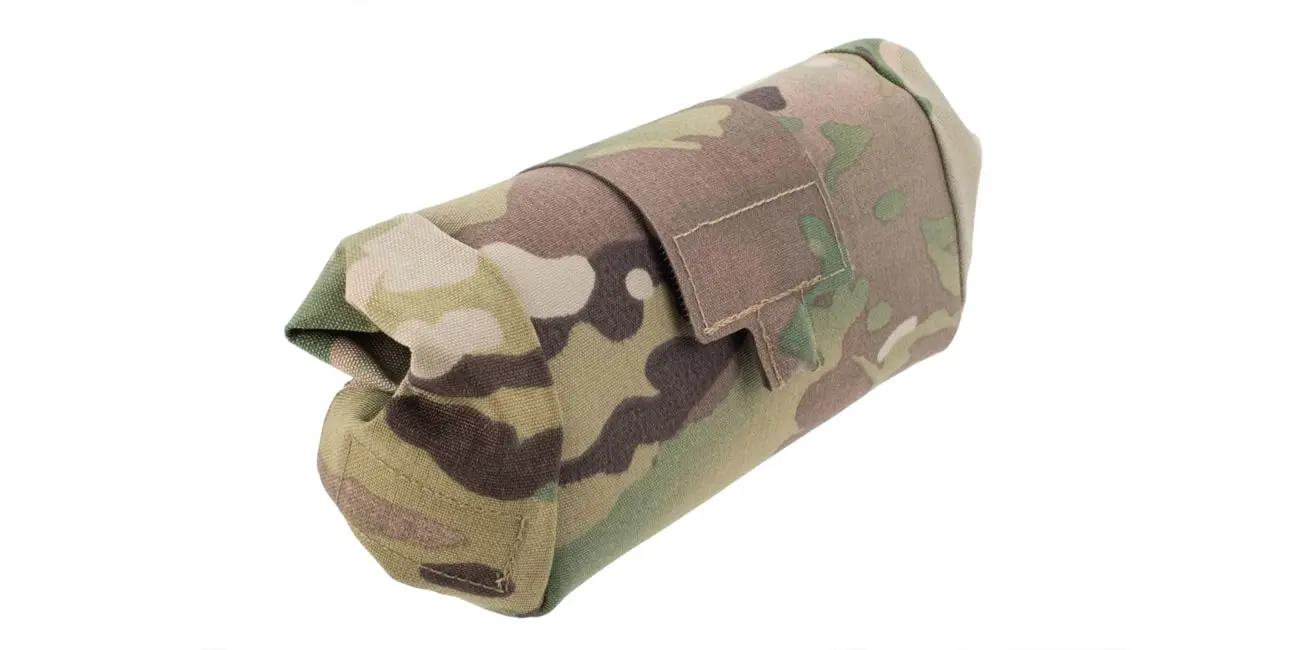
DUMP POUCHES
Most of us don’t have to look down at our plate carrier to find our mags for a reload. Where you might run into trouble, though, is in retaining your spent or partially full magazines after reloading.
If you’re used to stuffing half-full or empty mags back into pouches on your plate carrier, you may want to think about switching to a dump pouch instead. Even magazine pouches with flared openings can be tough to stuff a mag into, especially under stress.
A dump pouch, like an enlarged bolt catch or flared magwell, increases your acceptable margin of error.
If you miss a magazine pouch opening by an inch, your mag is going on the ground. With a dump pouch, you could miss the center by several inches and still retain your magazine.
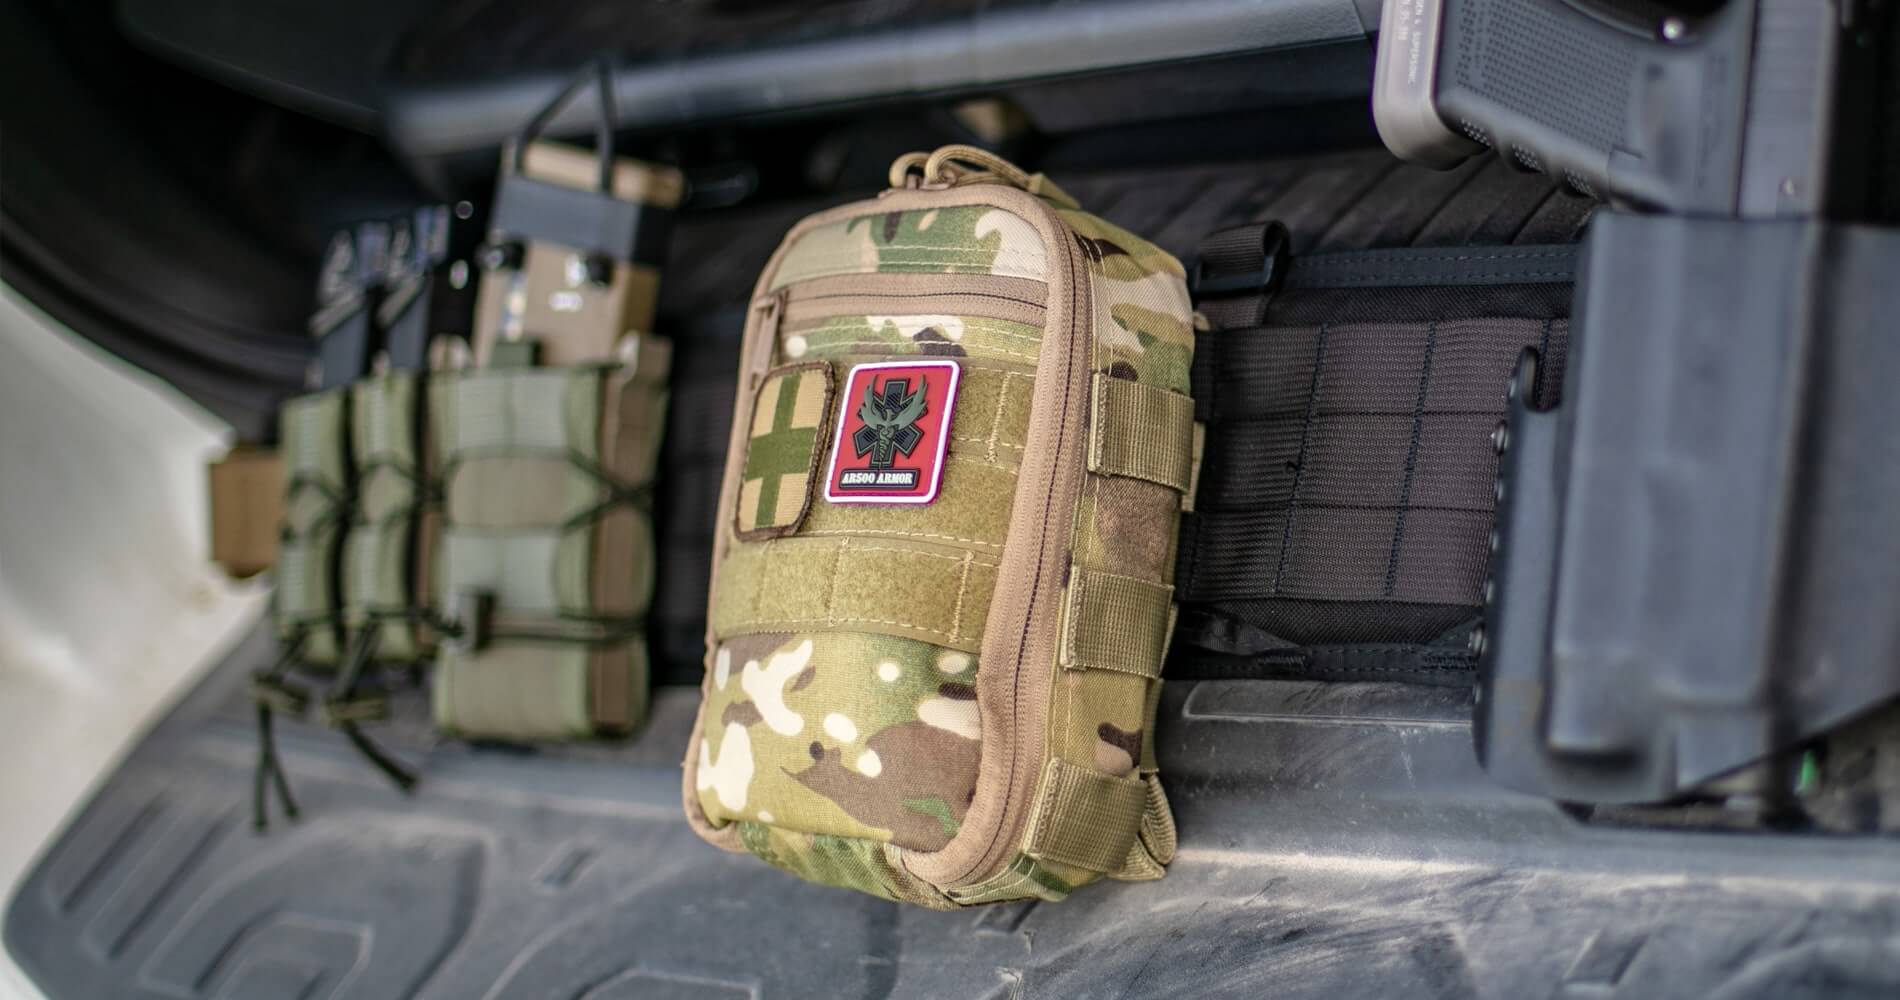
FIRST AID
If you’re planning on working with night vision, everything in your kit ought to be navigable by touch alone—especially your first aid. Being able to get to your IFAK and tourniquet quickly and deploy them effectively is crucial and can easily save your life.
Your tourniquet doesn’t necessarily need to be stowed with your IFAK—they can be rigged in separate locations, but both need to be accessible with either hand without sight. This is largely a matter of practice, but location can make a difference, too.
For instance, it’s not uncommon to see a tourniquet stuffed into a pistol mag pouch at a range day or training course. This may be serviceable in the daylight, but if your tourniquet is staged in a pistol mag pouch alongside a couple of other identical pistol mag pouches, then you run the risk of fumbling under stress or injury.
Obviously, this is less of an issue when you can glance down at your waist and find what you need, but when using NODs, a separate and distinct pouch or carrier is advisable. This goes for less crucial equipment as well, whether it’s a flashlight, multitool, or more specialized piece of gear. Each different tool should have a pouch or holster that’s distinguishable by tactile sensation alone.
Within an IFAK, there’s a limit to how far this principle can go; even experienced users would be hard-pressed to tell a pack of combat gauze from an emergency trauma dressing if both are in plastic wrap.
At a minimum, though, you ought to be able to reach and deploy your IFAK with either hand, without looking.
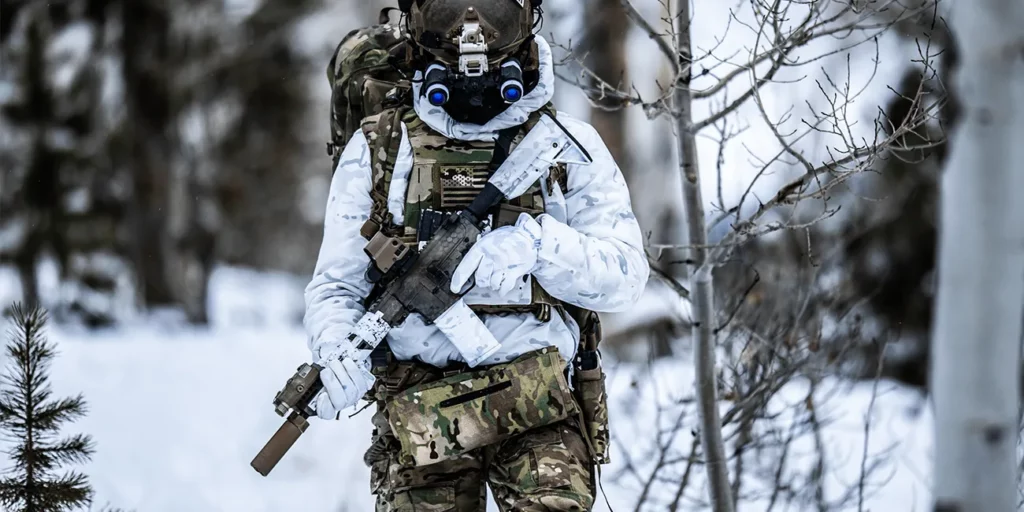
CLOTHING
Clothing is an often-overlooked component of nighttime operations. When we talk about daytime tactics, camouflage is often just assumed to be the outfit of choice. Most users require little instruction to choose appropriate camo; it’s usually as simple as selecting something that blends in with your local environment. When we add night vision to the mix, it gets a bit more complicated.
Under night vision, the material and pattern are less important than IR reflectivity. Many fabrics (especially cheaper ones) are highly reflective under IR illumination and will shine as though you were wearing tin foil. Even good daytime camouflage can be highly reflective to IR light, making you much, much easier to spot if your opposition is using any kind of active illumination.
As with most tactical problems, there is a solution—in this case, in the form of NIR-compliant clothing.
NIR-compliant clothing is specially manufactured to have a reduced signature under IR illumination. These garments feature specific materials and dyes in order to avoid reflecting IR light as much as possible. Functionally, this makes the clothing appear darker and stand out less from its surroundings when viewed through night vision devices.
There are a lot of manufacturers of NIR-compliant clothing and a wide range of different camo patterns available. Nowadays, though, most users choose a variant of MultiCam. This pattern works well in a wide range of environments for daytime use. Since it’s so common, you’ll have no trouble finding NIR-compliant apparel and gear to match.
No matter which camo pattern you prefer, there’s one certainty: stay away from flat black patterns. For decades, TV and movies have depicted night fighters in black uniforms, but the real world plays by different rules—especially with regard to night vision.
If you want to blend into your surroundings at night, your uniform should match your surroundings. If you’re wearing a flat black uniform, anyone with night vision will see you as an obvious void in a sea of bright green. The same is true if you get spotted by a flashlight. A green environment is just as green at night as it is during the day.
The only time black camo has any benefit is if the wearer is in light and is silhouetted against a perfectly dark background. This is a very, very niche benefit that only applies if viewed by the naked eye. Under night vision, though, black camo provides no benefit and will only contrast you against your surroundings.
Long story short: flat black is poor camo for daytime OR for nighttime use. The whole mythos of night warriors wearing black is just that—a myth for costumes in plays and movies. Look at your environment and find a camo that blends in all 24 hours of the day.
SUMMARY
Your night vision device is a big part of your night-fighting loadout, but it’s not everything. Properly setting up your clothing and gear can help you better prepare for nighttime operations and tilt the odds of success in your favor.
From the gun you choose to the clothes on your back, everything plays a part in your combat effectiveness when working with night vision. If you still have questions or need a recommendation for a product, give our customer service team a call. Our highly knowledgeable staff is here to help.
To contact us, just click on the “Chat” button on the lower right-hand side of your screen, or reach out to us on social media, including Instagram, Facebook, and Twitter.


