The term “dry fire” has been thrown around quite a bit in the gun community, so much so that you probably can’t go into one conversation at the gun range without hearing it at least once. Dry fire, dry fire, dry fire… what is it?
Dry fire training is an easy and safe way to practice the fundamentals of shooting without needing to buy additional ammo or go to the range.
Training is the only way to get better at something, and that same notion applies to shooting. Incorporating dry fire drills and building up a routine that reinforces positive muscle memory is a sure-fire way to take your skills to the next level.
Follow along as we break down the process of dry firing, and how it can benefit you regardless of your experience level.
What is Dry Fire?
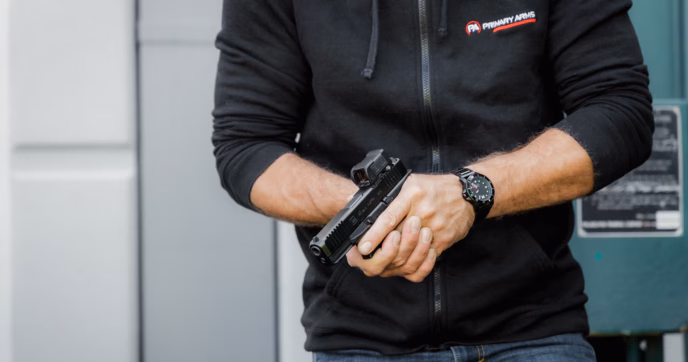
As mentioned before, dry fire is a safe and easy way to practice the fundamentals of operating your firearm. Essentially, you are replicating the act of firing your gun, just without live ammunition. By pulling the trigger when there isn’t live ammunition in the chamber, you can feel the pull weight, take-up, wall, and the break of the trigger. Think of it as target practice at home.
It doesn’t matter what your experience level is, knowing how your firearm feels when pulling the trigger is imperative to becoming better at handling your firearm when shooting. Repeating this process with good form reinforces positive muscle memory that can increase your overall firearm handling skills, trigger discipline, and shooting ability.
Another benefit of dry firing is that it’s easy to get started. No additional ammunition is needed, just your firearm and a target is all that’s required to start dry firing. This makes dry firing one of the easiest training processes to incorporate in your firearm training regimen.

Is Dry Firing Bad For Your Gun?
If you heard anything about dry firing, you’ve likely also heard that it’s bad for firearms. This isn’t completely true, though. Dry fire doesn’t pose any genuine risk to most modern firearms, since parts quality has improved significantly in the last 10-15 years. That said, dry firing can be detrimental to older models and rimfire firearms.
Rimfire caliber firearms can be damaged by dry firing them too frequently, so it isn’t recommended to practice dry firing exercises with them. Whereas centerfire firearms have hardened firing pins that strike the center of the cartridge, rimfire firing pins strike the outer facing on the base of the cartridge. Because of the design of rimfire strikers, excessive dry firing can cause unnecessary wear and tear on the firing pin assembly or damage it beyond repair. While we recommend and encourage to practice dry fire drills, we do NOT recommend doing so with a rimfire firearm.
Incorporating dry fire routine works best with centerfire firearms. Modern firearms have higher quality components, making them the best choice to use for dry fire. Modern handguns like those from Glock, Sig Sauer, and H&K (Heckler & Koch), for example, all have steel firing pins that can withstand repeated dry fire drills.
The same is true for centerfire rifles and shotguns as well. Over time, the firing pin can still wear out, but it can withstand thousands of dry fire drills.
For added protection, use of dummy rounds or snap caps is recommended. Your gun’s firing pin was designed to be dropped with a round in the chamber, and snap caps/dummy rounds prevent your firing pin from wearing out when dry firing. They are available in many calibers and have the same dimensions as regular cartridges for your firearm. Using snap caps, like those from Tipton, or other dummy rounds is a great way to prevent any unnecessary damage when dry firing. Though unlikely, it never hurts to be extra cautious when dry firing.


Shop All Semi-Automatic Pistols
How to Practice Dry Fire Drills
Now we’re getting to the fun part! Just like we said before, dry fire drills are an easy way to practice the fundamentals of shooting. We’re going to break down some drills you can practice at home to get you more familiar with the operation of your firearm, the trigger pull, and methods to point out errors in form or technique.
Dry Fire Prep
Just like any form of firearms practice, safety is the top priority. Before you do any drills, verify that your firearm is unloaded by dropping the magazine, and clear the chamber by pulling back the slide or the charging handle. Don’t just rely on running the action. You should also visibly inspect and physically feel whether or not a round is in the chamber. Once you’ve verified that your firearm is unloaded, you can either load your magazine with snap caps/dummy rounds or you can leave it empty. Regardless, make sure that there are no live rounds in the magazine or chamber of your firearm.
If you’re practicing at home, make sure that you have an open space to move comfortably in, a target set up to aim at, and there isn’t anyone around that might be in the way (remember, basic firearm safety standards apply even when dry firing). The great thing about dry fire is you can practice for targets at any distance with relative ease.
Now that your firearm is cleared and safe, you’re ready to run dry fire drills. Follow along as we break down a few drills to get you started.

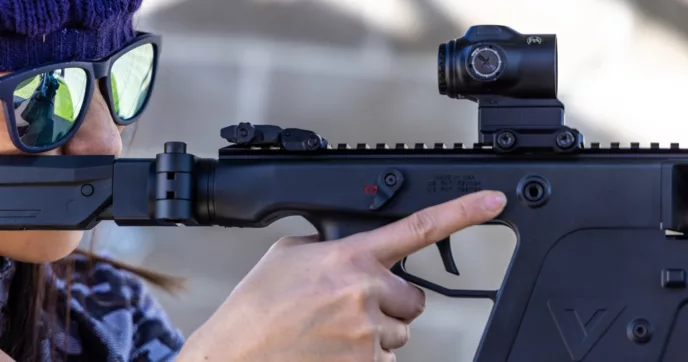
Static Dry Firing Drill
The Static Drill is one of the simplest dry firing drills you can perform at home. To get started, take your firearm and acquire your target. Charge your firearm so that the hammer/striker is primed, ready to fire; start in the low ready position, facing your target. Make sure you have a stable stance and good grip on your firearm of choice. Next, take aim and pull the trigger. Try to hold still when you pull the trigger to see where you were aiming when you pulled the trigger. This will show you if you pulled the shot or were off target. Re-charge your firearm and try again. If needed, alter your grip or stance and work towards not flinching when you pull the trigger. Repeat this drill for anywhere from 10 to 20 minutes a day, and your shot placement should improve.
This drill works well with any type of firearm. Since you are starting in the low ready position, it is the simplest drill you can practice. If you’re planning to use this dry fire drill to practice for home defense, you can set up targets to practice with in different rooms to better prepare yourself for a home defense scenario.

Drawing Drill
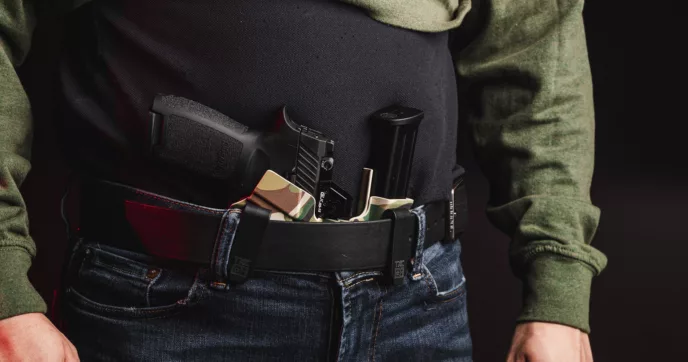
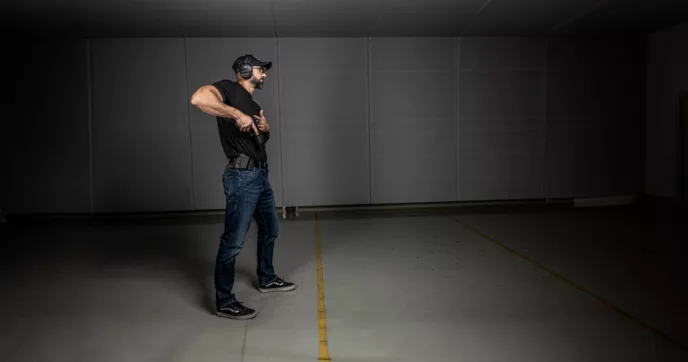
A drawing drill is when your handgun is stored in your holster, you draw, and then dry fire at a target. This drill can better prepare for situations where you would need to draw your pistol and shoot at a target; three-gun competitors often use this drill to better train themselves on transitioning from rifle to pistol. One benefit of this drill is that it can be done with either an IWB or OWB holster.
To begin the drill, set up a target from a distance of your choice (we recommend working up to longer distances) and carry your gun in your holster the same way you would for everyday carry (appendix, hip, back, etc.). Relax your body, and when you’re ready, draw your pistol from your holster, take aim, and pull the trigger. Be sure to pull tight any loose garments or clothes you may be wearing. You want to make sure you have no obstructions or potential points of snagging when you draw your handgun. Assuming you are drawing from an IWB holster, pull your shirt up and out of the way with your non-dominant hand and draw with your dominant hand. Once you’ve removed your pistol from the holster, you can grip the gun with both hands and take aim. Just as for the static drill, try to remain still after shooting to see where your gun was aimed when you pulled the trigger. This drill is a little harder than the static drill since there is more movement involved, but like anything, practice makes perfect.
Incorporating holster drills in your training regimen will help you better develop your defensive shooting fundamentals and build up confidence when carrying every day. You can work in different variations of the drill as well. Practice this drill while standing like during the static drill, walking, and sitting down. You never know when or where you’ll need to defend yourself, so incorporating these variations in your dry fire training will better prepare for any scenario that could happen in real life.

Reloading Drill
Just as salt goes with chips, reloading goes with shooting. A reloading drill is simply performed by reloading a new magazine into your firearm of choice. There are two ways you can perform this drill. One way is to start with your firearm pointed at your target, drop the magazine from your firearm, load in a new one, pull back on the slide or charging handle to simulate chambering a new round, and point your gun back at your target. Depending on what firearm platform you’re using, you may need to manually release the slide, or bolt carrier group, of your firearm to simulate chambering a new round. In most cases, you will need to manually drop the slide or bolt when shooting at the range, since it will automatically lock back on an empty magazine. It’s worth noting, however, that if you are drilling with an AK or other firearm that doesn’t have a bolt release, you will need to re-rack its charging handle/bolt.
Once you’ve gotten used to the mechanics of static reloading drills, you can add some variations to make it more dynamic. Just like a static dry fire drill, start in the low ready position, raise your gun, point it at the target and fire instead of charging the gun to get ready for another shot, drop the magazine out of your firearm, load in a new one, charge the gun and fire. This drill gets you accustomed to the motions needed when performing reloads when shooting. Quicker reloads means you can get back to shooting at your target. This is especially beneficial if you are dry fire training for competitions, since you’ll be competing to get a quicker round time than your opponents.
Something else to try is to incorporate reloads in your other drills. Mixing up the scenarios you train for will get you ready for any situation. Adding a reload drill to your static drill will get you used to performing reloads, and once you’re comfortable with this, adding in more movement will increase your hand eye coordination and abilities to be capable with a firearm when on the move.

Other Things to Consider:
What’s great about the aforementioned dry fire drills is that you can change your approach to each one. Now that you are incorporating dry fire drills into your firearm training routine, it can do more to benefit you and take your skills even further.
By now, the drills you’ve done have increased your dexterity and the practice of your fundamental skills. It’s good to continue practicing drills with your dominant shooting hand, but it’s also beneficial to practice with your non-dominant hand. Running drills with your non-dominant hand prepares you for any situation where you may need to use it. For example, if you are in a situation where you need to shoot around a corner, depending on what side the corner is one, you may expose yourself if you use your dominant hand and stance. Switching to your offhand allows you to readjust while keeping you concealed, adding another layer of safety to your shooting practice.
While practical in competitions, offhand practice can lend support for real-world scenarios, too. Say you’ve broken your arm after falling and can no longer use your dominant hand for everyday concealed carry. Having the ability to switch to your offhand and shoot both comfortably and accurately is a must.
It’s beneficial to know how to operate your firearm at unusual angles. Practice your drills in the same way you do now but incorporate different angles and shooting positions. You can set your target up around a corner, behind a barrier of some kind, or in a position where it is necessary for you to go prone. You never know what kind of situation you will be in when you must use a firearm; whether you’re training for self-defense, competition, duty, or for recreation, it’s important to know how to use your firearm to its maximum capability, regardless of your surroundings.

Ways to Enhance Dry Fire Drills
We’ve touched on how you can enhance the efficacy of your drill by incorporating different positions, grips, and movement, but there are other ways you can enhance your experience as well. While getting started with dry fire practice is easy, there are ways to make it easier and more effective for long-term practice with proper training gear. Good dry fire training gear goes a long way when running drills.
Shot Timer
Shot timers are most often used in shooting competitions to signal the start. They are also widely used in drilling and training. Shot timers not only signal the start time, but they also time your shots so you can see how quick you were.
By doing this, you can log accurate times to compare against when you dry fire. If your goal is to have a faster draw time, quicker reload, or faster static drill time, a shot timer is one of the best ways to accurately time yourself. There are phone apps that work similarly to shot timers, but they aren’t always as accurate. While they work in a pinch, if you know you’re going to want accurate shot times, we recommend getting a dedicated shot timer.

Snap Caps and Dummy Rounds
We mentioned snap caps and dummy rounds earlier, and they are great for dry fire. As we said before, they prevent any unnecessary damage to your firearms firing pin. Additionally, since they are the same dimension as the caliber you are purchasing them for, they fit into your magazines for that firearm.
For example, if you are dry firing with a Glock 19 chambered in 9mm, you can load your snap caps into your magazines. This makes them a great addition to add in for your reload drills, allowing you to get an even better feel for how your gun will reload with loaded magazines.

Mantis Products
Mantis is a company that makes a wide variety of products for improving dry fire drills. Whereas before when dry firing, you would need to hold your position to see where your shot would land if you were to have shot there; now you have a visible indicator that would show where your impact would be. Mantis offers many products to aid in dry firing:
Mantis X System
The Mantis X System is a laser dry fire training system that is compatible with almost all firearms available today. Using a device that mounts to your gun’s accessory/light rail if using a pistol, and picatinny rails if using a rifle (adapters can be purchased separately if needed). The Mantis X tracks the movement on your firearm when you are dry firing, collects data based on those movements, and sends it to an app for your smartphone. Depending on the model, it can work with dry fire drills and live fire practice. It provides real-time feedback for each shot and records the data to show you how you’ve improved from prior training sessions.
The app included with the Mantis also gives you access to different courses and exercises to put into practice. Some of these drills involve shooting while on the move, multi target training, moving targets, reloading drills, and off-hand, to name a few.
With the shot analysis and scores this device provides for you, it is an excellent option for those looking to take their training to the next level.

Laser Academy Training Systems
Similar to the mantis system, the Laser Academy from Mantis allows you to simulate having a training facility at your home. It comes with multiple targets, stands, a tripod for your phone, and a target practice laser cartridge to use when dry firing.
The Laser Academy app comes with four different training modes that offer different drills and scoring systems. Like the Mantis X system, previous scores are recorded, allowing you to track your progress as you continue your dry fire training. The kit includes a cartridge like a snap cap that shines a laser when the trigger is pulled. With your phone connected to the app and mounted on the tripod facing the targets, it can record this data to give you a final overall score to show you performed when you were practicing your dry fire drills.
This is one of the best at home dry fire training systems on the market. The kit provides you with all the necessary components to track your dry fire drills.
Blackbeard
The Mantis Blackbeard. is an auto-resetting trigger system designed to fit in AR-15 style rifles. It allows users to make repeatable shots that provide a visible indicator of where the shot would be on target. It’s also one of the best laser units for AR-15 dry fire drills.
Specifically for AR-15 platform rifles, you can continue to dry fire your rifle without needing to re-charge the rifle. Also included is a magazine battery pack to keep your laser dry fire training unit powered. If you’re opting for just the automatic reset feature without the need for visible feedback, Mantis offers the Blackbeard without the laser.
Not only can the Mantis Blackbeard provide up to 100,000 “shots” when fully charged, it adds weight to your rifle, making it feel closer to a loaded rifle. This will make your transition from dry firing to live fire practice much easier, since you’ll be used to the weight. In addition to “red” and “no laser” options you can get the laser in different colors, including green and even infrared, giving you the opportunity to train at night with NODs.

Conclusion
Dry firing will reinforce your fundamental shooting skills and develop good muscle memory that will improve your performance at the range. While there are a lot of extras you can purchase to aid you in your practice, they aren’t necessary to start.
Regardless of what your purpose for gun ownership is, whether it is for duty, defense, recreation, or competition, incorporating dry fire drills in your training routine is great for boosting your performance and confidence.
All in all, if you’re looking to start improving your ability when shooting, there isn’t a better method than dry firing. With little to no cost needed to start, so long as you have a firearm to train with and a target to aim at, you can get started today.